More and more people are using no-code technologies to create mobile apps, and there are a growing number of vendors in this area. In this article, we’ll be focusing on Microsoft’s no-code platform, Power Apps.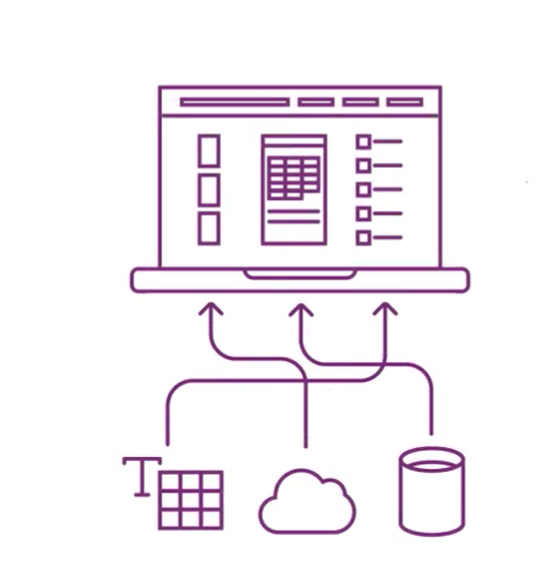
Because it’s a no-code platform it should be easy to create apps, right?! Well, yes, it is easy to use the platform and create simple apps, but the process can be somewhat confusing to first-time users. We’re therefore going to answer some questions that people starting out are likely to ask, such as
- How do I get started with Power Apps?
- Is Power Apps really easy to use?
- What is Power Apps best suited for?
What is Power Apps? An Overview
Power Apps is a Microsoft platform for developing mobile applications for your business. It makes it easy to connect to data sources, create user interfaces and build business logic to cater to a range of use cases.
Power Apps is part of the Microsoft Power Platform, which also includes Power BI, Power Automate, and Power Virtual Agents.

- Power BI –analyze data from different data sources
- Power Apps –build mobile apps for internal use
- Power Automate –design automated workflows to replace manual tasks
- Power Virtual Agents –develop chatbots that can communicate with external customers
One of the key features with each of these components is that they have a relatively low entry point in terms of technical knowledge, whilst being extensible to cater to advanced scenarios for developers and data specialists.
So, in the case of Power Apps, it has a simple intuitive interface and some handy shortcuts so that non-technical users can create simple feature-rich applications quite easily. The intention is clearly to remove some of the barriers so that a wide user group can develop and implement business solutions at a quicker pace. This is obviously appealing in today’s fast-paced business environment.
What is Power Apps Used for?
In terms of general scope, Power Apps is intended to be used by organizations to create business-centric mobile apps for internal use. It is not a general platform for creating apps beyond that.
The strength of Power Apps is the speed and ease with which apps can be designed, developed, tested, and deployed. The kind of use cases it’s best for are therefore small focused apps that meet a specific need, rather than larger apps with greater span. Organizations will typically create a portal or launchpad containing a multitude of Power Apps to meet needs across the business.
Here are some common use cases where Power Apps are well suited:
- HR – onboarding, leave requests, travel approvals
- Sales – product catalogs, quote generation, sales dashboards
- Warehouse – Inventory management, order picking/packing, shipping
- Training – course booking, knowledge base systems, trainee progress tracking
- Field Service – asset tracking, inspection checklists/forms, maintenance schedules
- IT operations– support tickets, asset tracking, project tracking
You can see from this list that Power Apps are often introduced initially to replace simple paper-based processes, such as leave requests, or approvals of some sort.
Getting Started with PowerApps: 5 Simple Steps to Build an App
We’re going to look at a simple example to demonstrate the steps involved in creating an app in Power Apps.
The aim is to create a product catalog which our salespeople can use when they’re visiting customers. Here is a screenshot of what we are aiming for:
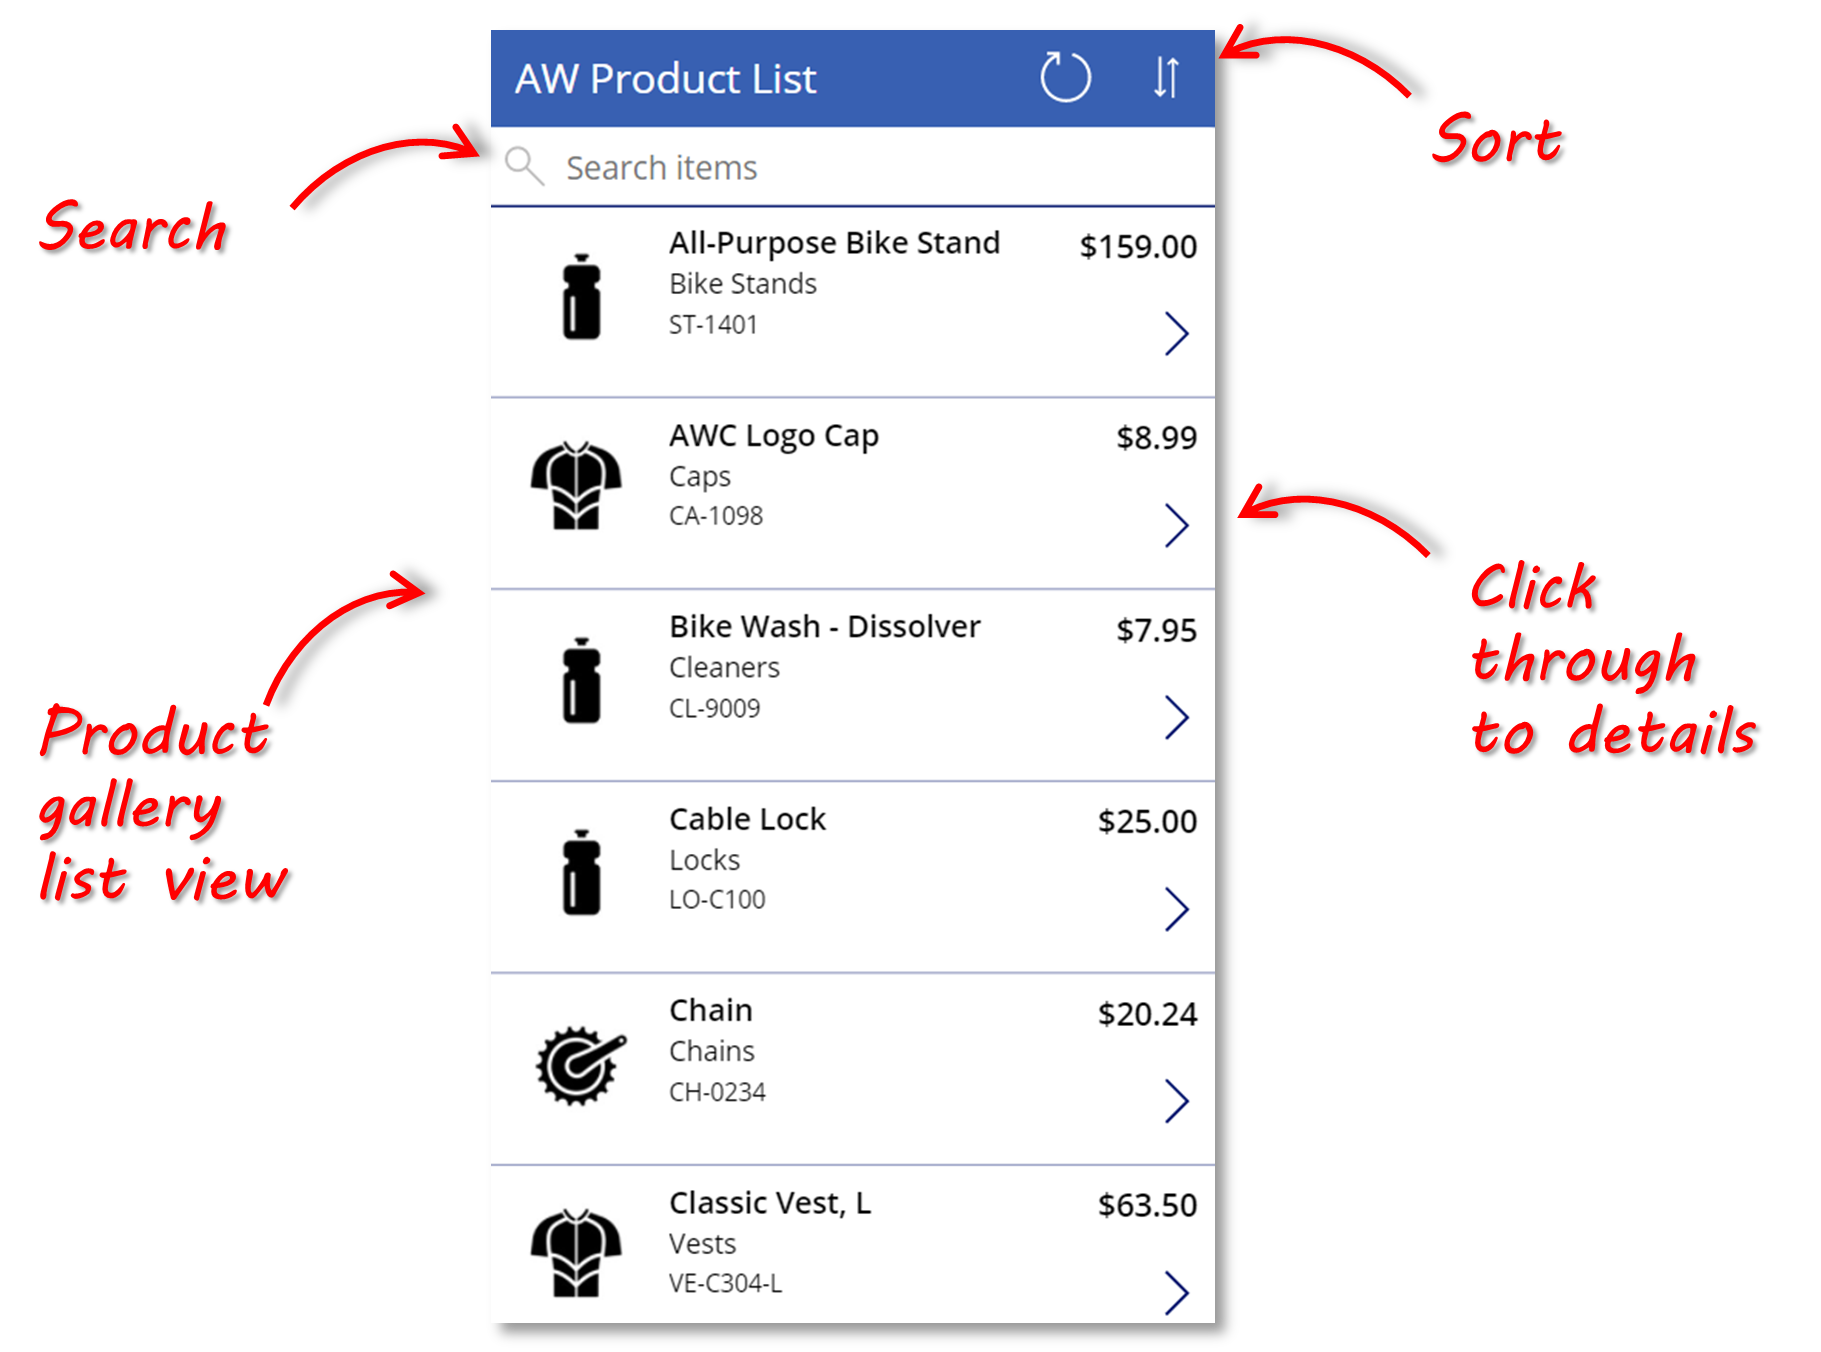
This simple app only has a few features, but it will give you a good idea of how easy it is to get started, and also how customizable Power Apps is.
The app uses the AdventureWorks sample database as a data source – specifically a simple view which creates a list of products, their categories, prices, and stock levels. You can get the AdventureWorks database from here. The code to create the view that the app uses is shown below:
CREATE VIEW [AdventureWorks2019].[Production].[v_ProductNameModelCategoryInStock] AS
SELECT A.ProductID,
A.ProductNumber,
A.Name  as 'Name',
D.Name as 'Model',
C.Name as 'Category',
B.Name as 'SubCategory',
A.Color,
A.StandardCost,
A.ListPrice,
SUM(E.Quantity)  as 'Quantity In Stock',
G.Description
FROM [AdventureWorks2019].[Production].[Product] A
JOIN [AdventureWorks2019].[Production].[ProductSubcategory] B on A.ProductSubcategoryID = B.ProductSubcategoryID
JOIN [AdventureWorks2019].[Production].[ProductCategory] C on B.ProductCategoryID = C.ProductCategoryID
JOIN [AdventureWorks2019].[Production].[ProductModel] D on A.ProductModelID = D.ProductModelID
JOIN [AdventureWorks2019].[Production].[ProductInventory] E on A.ProductID = E.ProductID
JOIN [AdventureWorks2019].[Production].[ProductModelProductDescriptionCulture] F on A.ProductModelID = F.ProductModelID
JOIN [AdventureWorks2019].[Production].[ProductDescription] G on F.ProductDescriptionID = G.ProductDescriptionID
Where F.CultureID = 'en'
group by A.ProductID, A.ProductNumber, A.Name, D.Name, C.Name, B.Name, A.Color, A.StandardCost, A.ListPrice, G.Description
Step (1): Create the Data Connection
From your Power Apps home page (https://make.powerapps.com/), click on Data > Connections and then click on New connection and select SQL Server from the list of options.
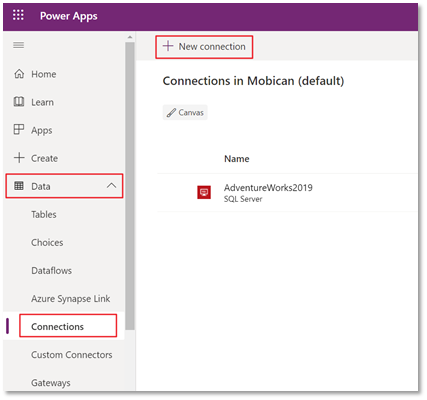
In the SQL Server configuration dialog box, the first thing we need to do is select the authentication type.
When you publish an app that connects to SQL server, both the app and the connection are deployed to your users. This means that both the app and the connection are visible to users the app is shared with. It is therefore important that you consider the authentication method for these connections – they can be shared explicitly or implicitly. It is best practice to use explicit connections for your Power Apps. There is a good article here that explains the differences and implications in more detail.
For our example, we have an on-prem database, so we’re going to select Windows Authentication (non-shared).
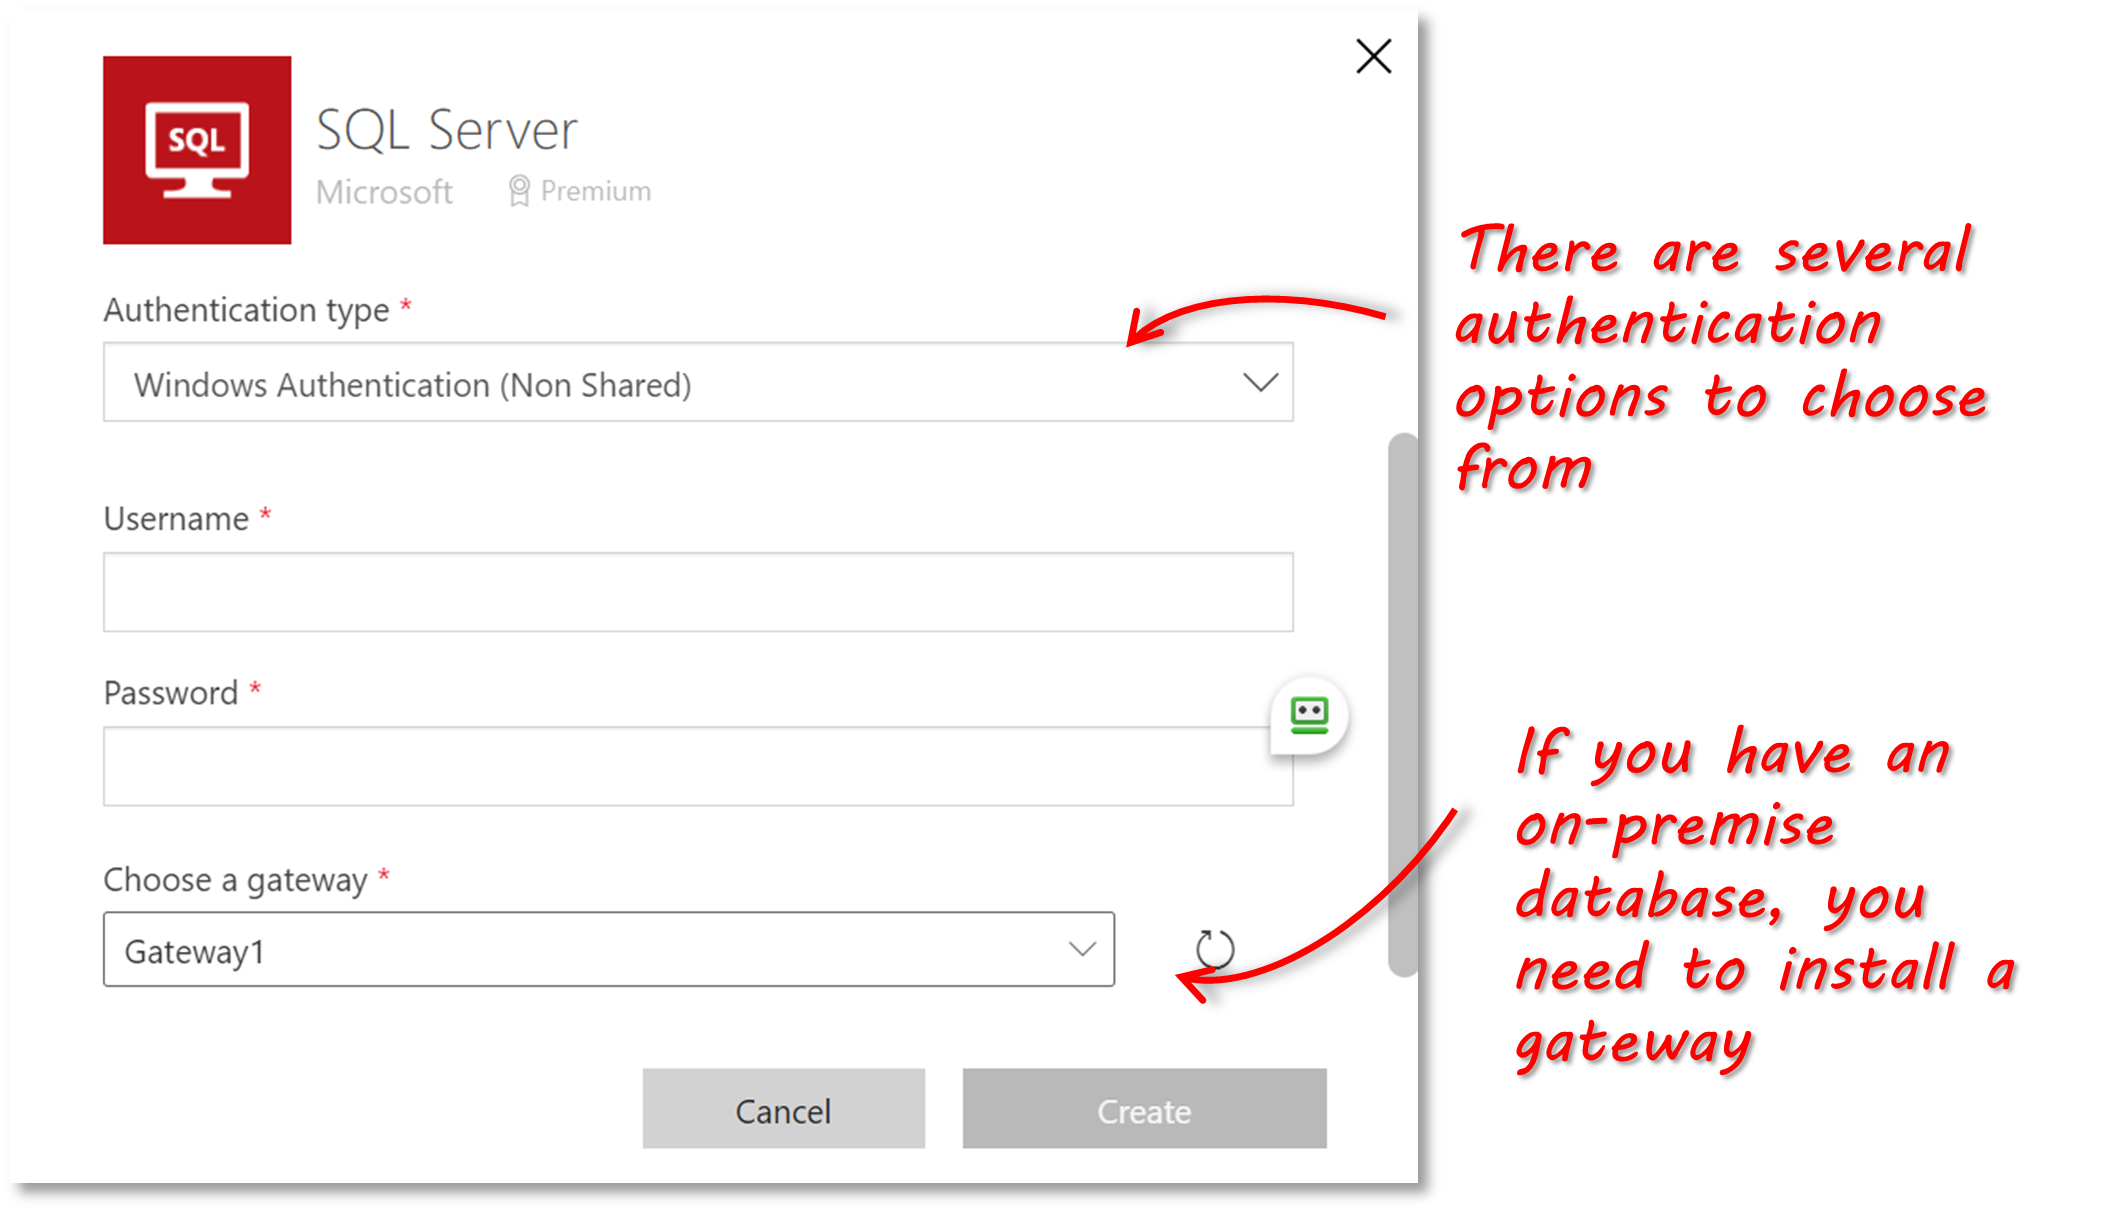
After entering your Username and Password, you need to select a gateway. The gateway acts as a bridge to provide quick and secure data transfer between on-premises data and cloud-based services like Power Apps. Of course, if you are connecting to a database in Azure, this step isn’t needed.
If you don’t already have a gateway installed, you can select the Create Gateway option. This will take you to the gateway download page. Follow the prompts to install the gateway. Once the gateway is installed, you’ll need to sign in and then register the gateway.
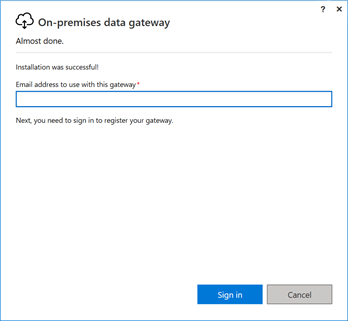
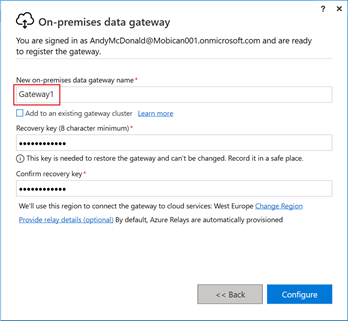
Once the gateway has been set up, we can go back to the connection we set up earlier, edit it, and select the gateway. We also need to name the connection – we can call it ‘AdventureWorks’.
The data connection is now set up and ready, so we can go ahead and create our app!
Step (2): Create the App
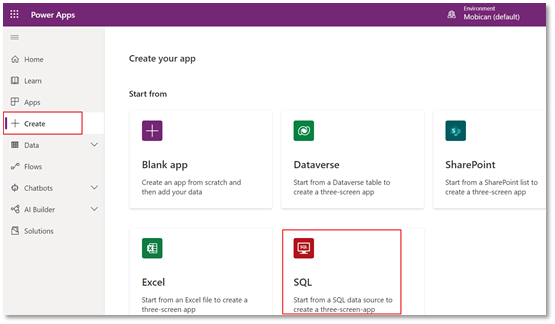
From the main Power Apps page, click on Create and then select the SQL option.
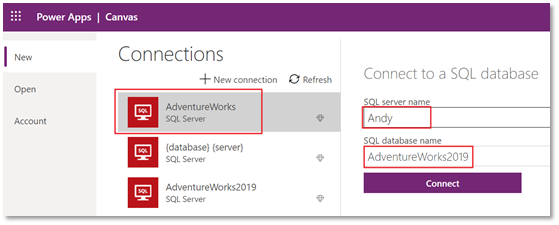
We’re going to select the connection that we just created and then fill in the server and database that we want to connect to:
Click the Connect button to display the list of tables and then select the view that we created earlier – v_ProductNameModelCategoryInStock.
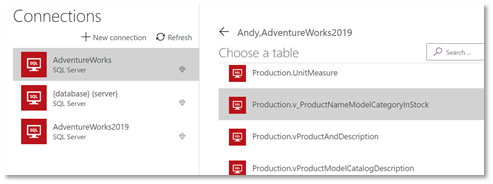
Once the view has been selected, the data will be loaded and the base app configuration will be created. Your new app is now ready to be customized.
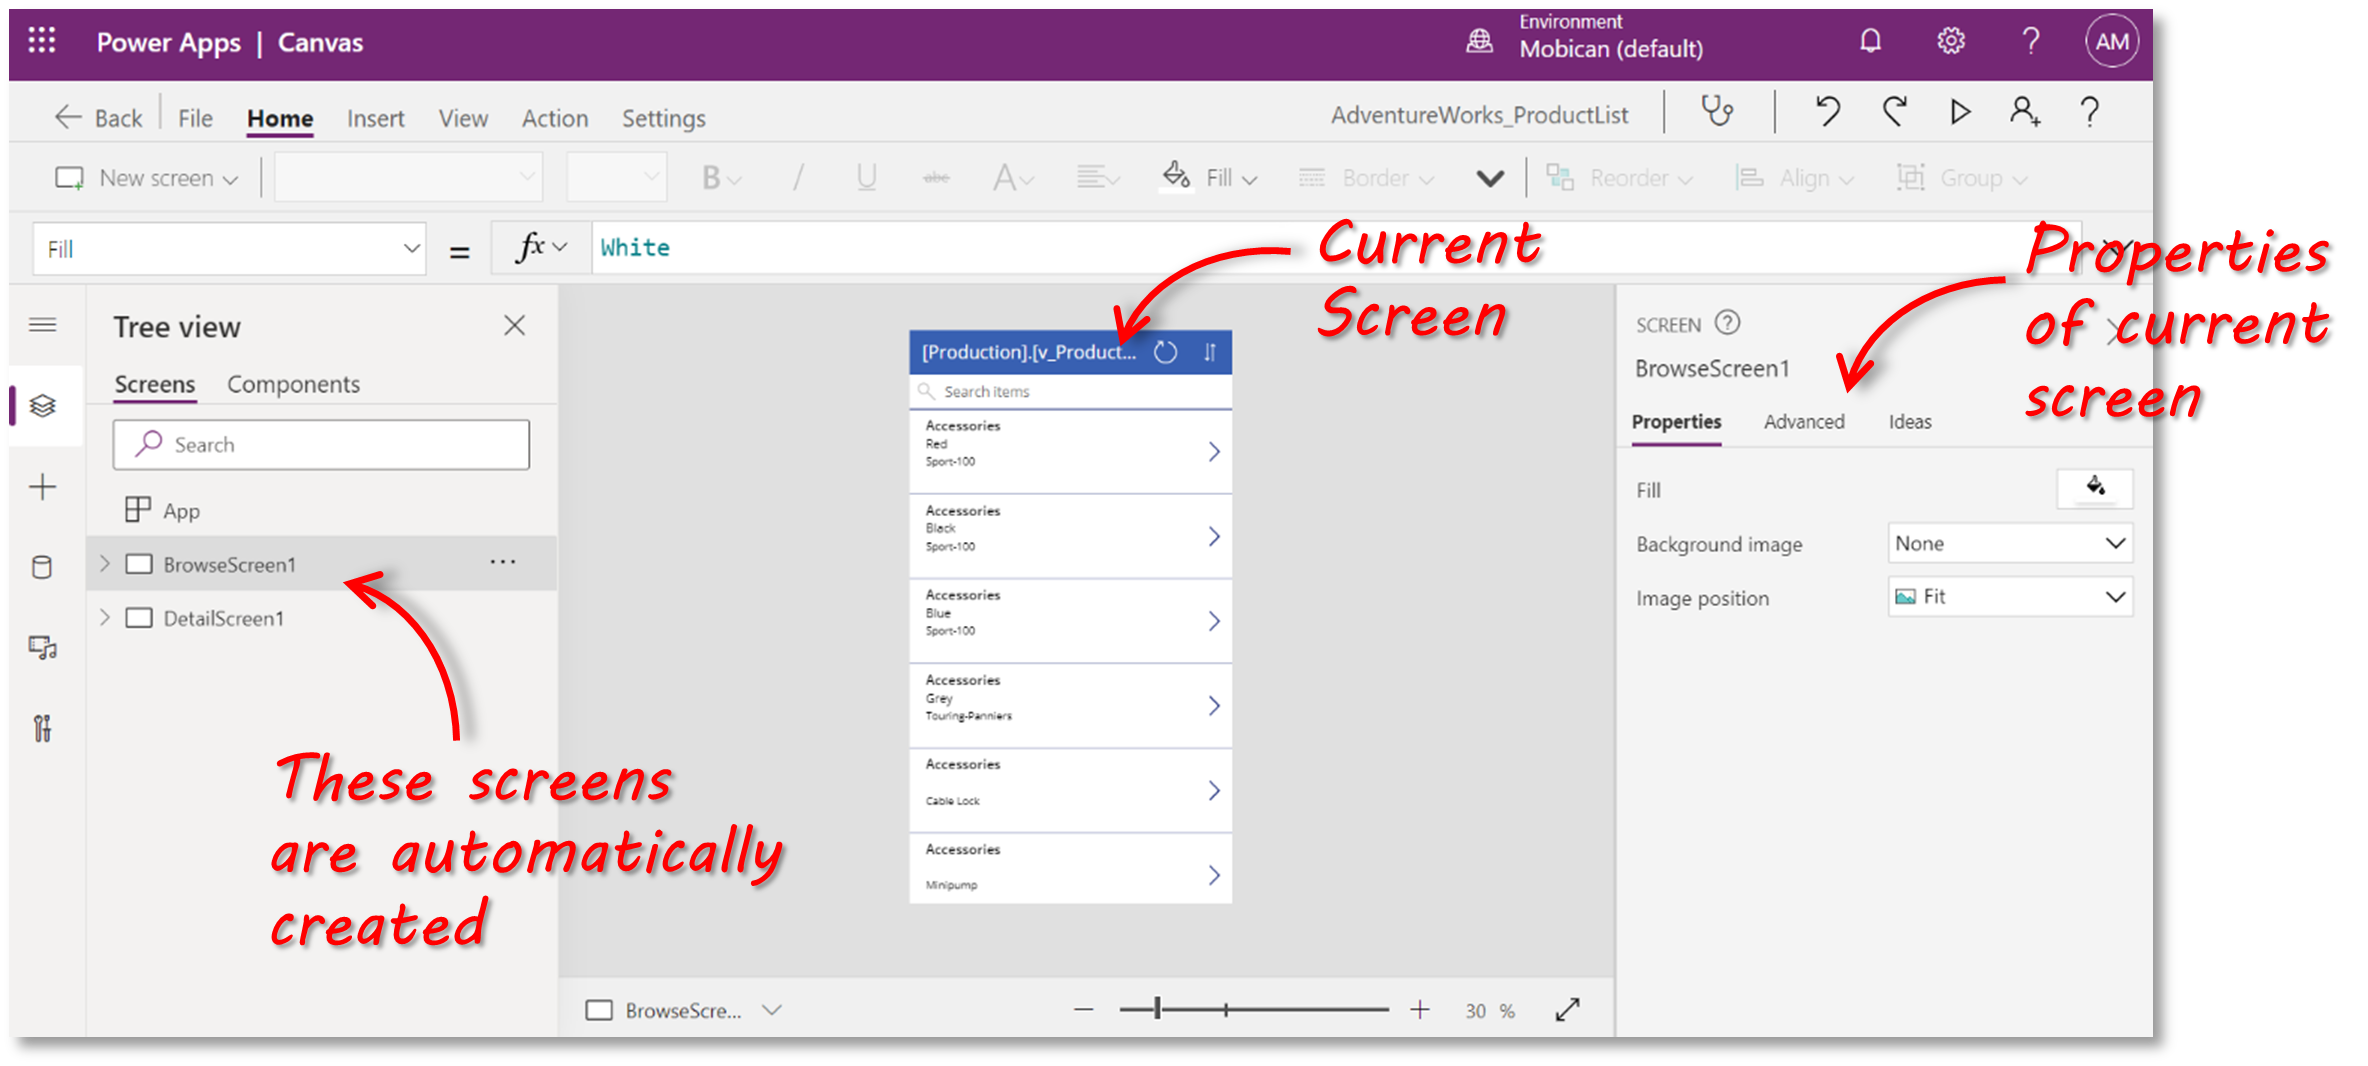
There are a couple of things to highlight about the way Power Apps sets up your default app initially:
- 2 screens are automatically created: one to display the items in your table/view in a list format; the other to show the details of a selected item. Note that if we had used a SQL table as a data source, instead of a view, a third ‘Edit’ screen would have been created.
- Navigation, Search and Sort controls and functionality are automatically added.
- The default settings and behavior of the UI elements (or ‘controls’) that get added to the screens can all be customized. Note that they all get assigned names which you should change to make it easier to keep track of things.
Whilst this app is fully functioning, and we could go ahead and publish it to our users straight away, we’re now going to customize the app with some minor improvements.
Step (3): Customize the Browse screen
As we’ve seen, Power Apps provides shortcuts to create common functionality like pre-configured list views and the ability to search. However, it also gives you a lot of control over how your app looks and behaves.
Let’s take a look at the Browse screen and make some changes to make it look even better.
Click on the BrowseScreen1 item to expand it. You’ll see that it contains several controls, one of which, the BrowseGallery, is a container holding more controls.
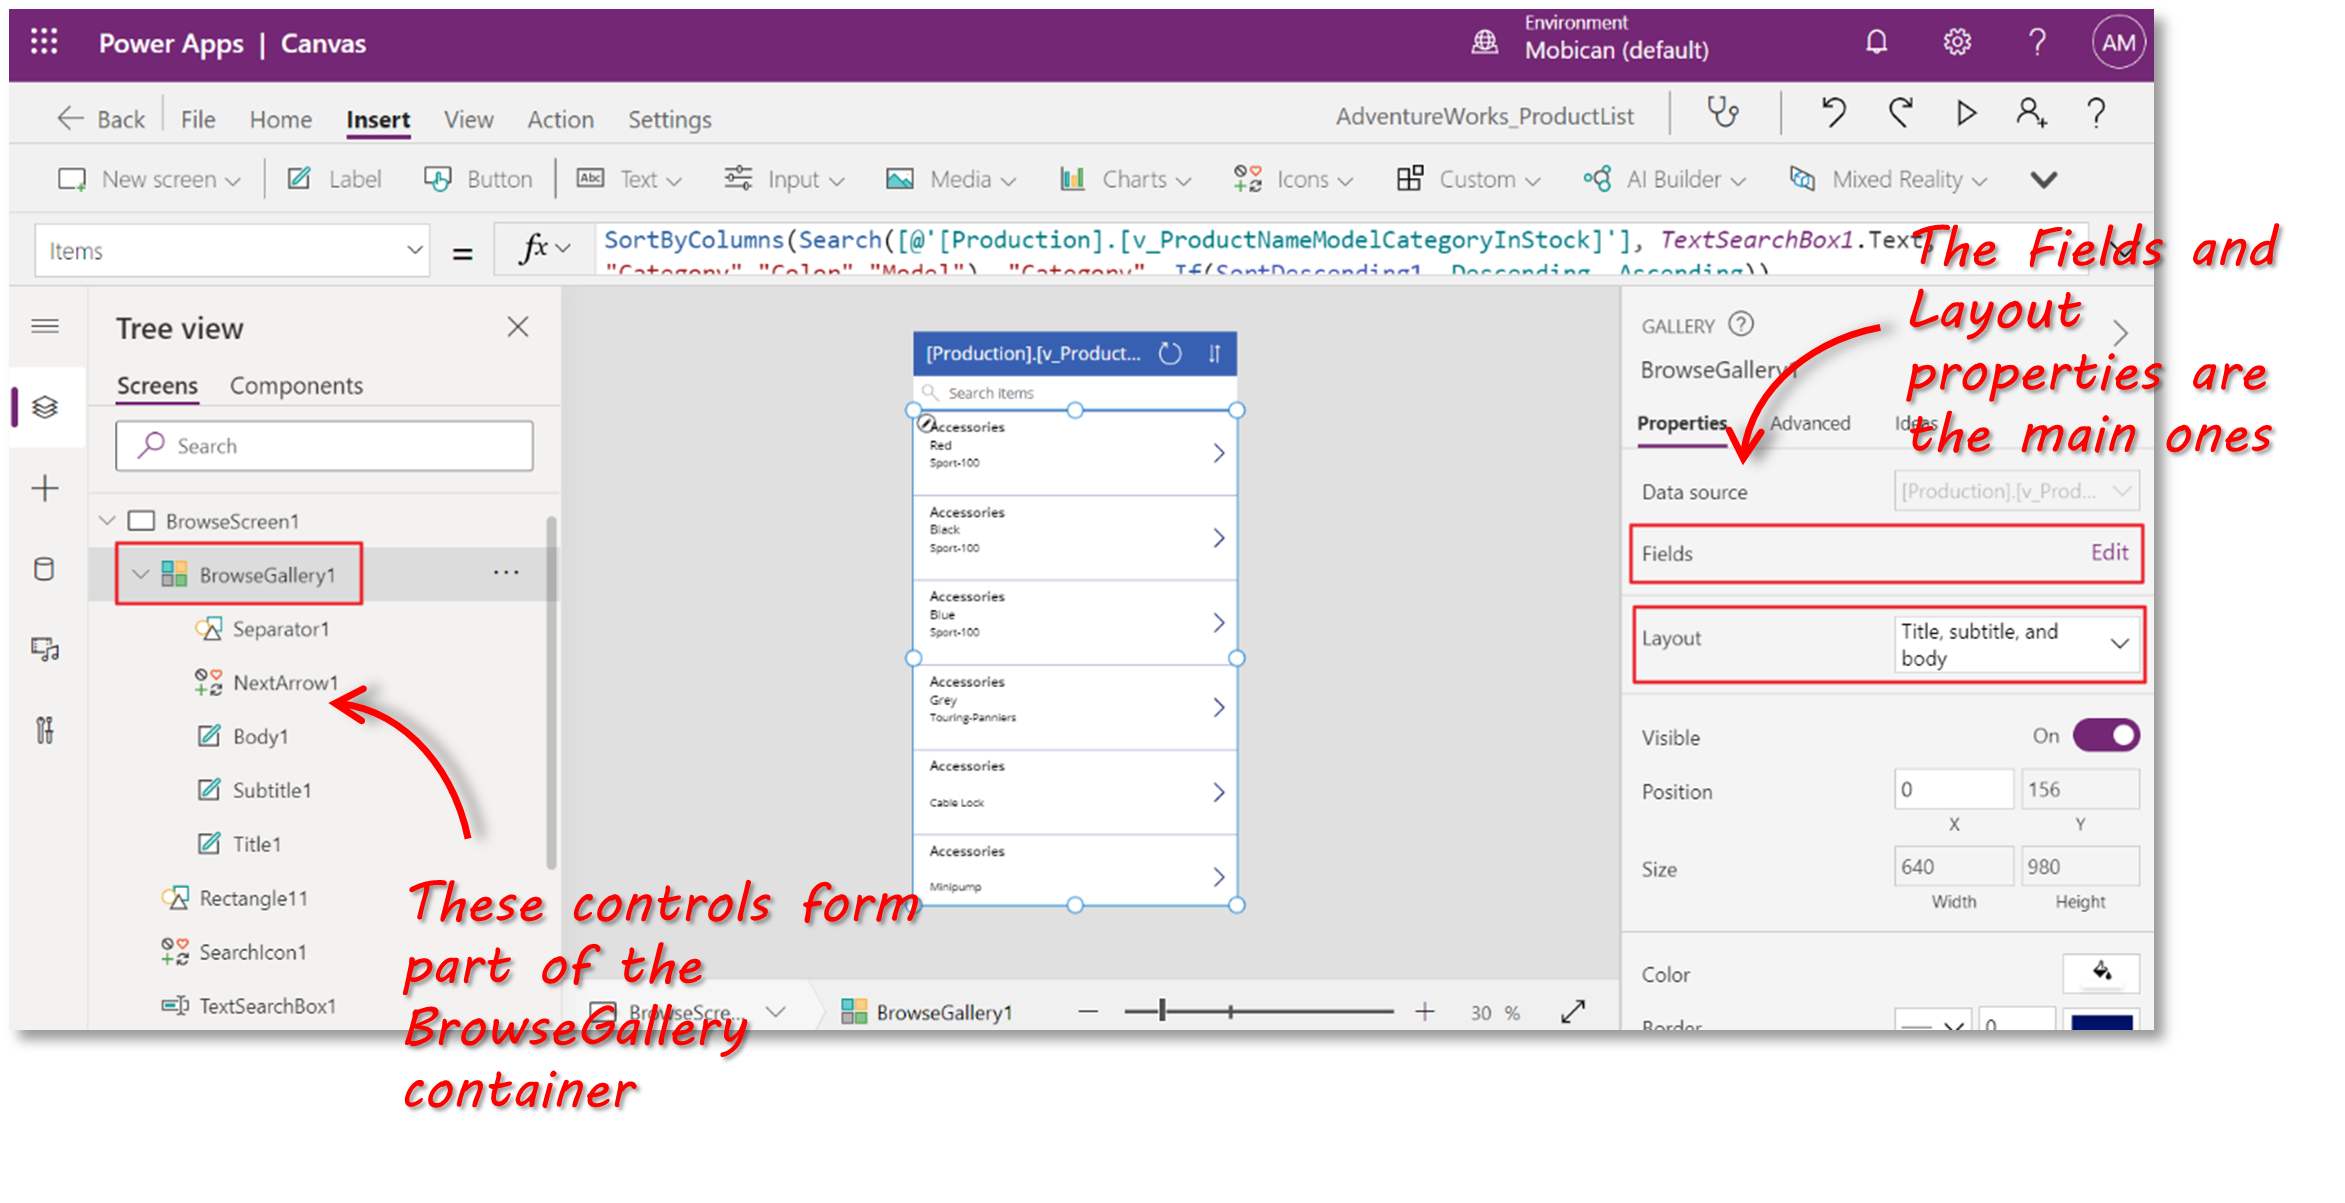
On the right-hand side, in the control properties pane, we’re going to modify the Fields and Layout properties.
First, click on the Layout dropdown and select the ‘Image, Title, Subtitle and Body’ option. Then go to the Fields edit button and select the following:
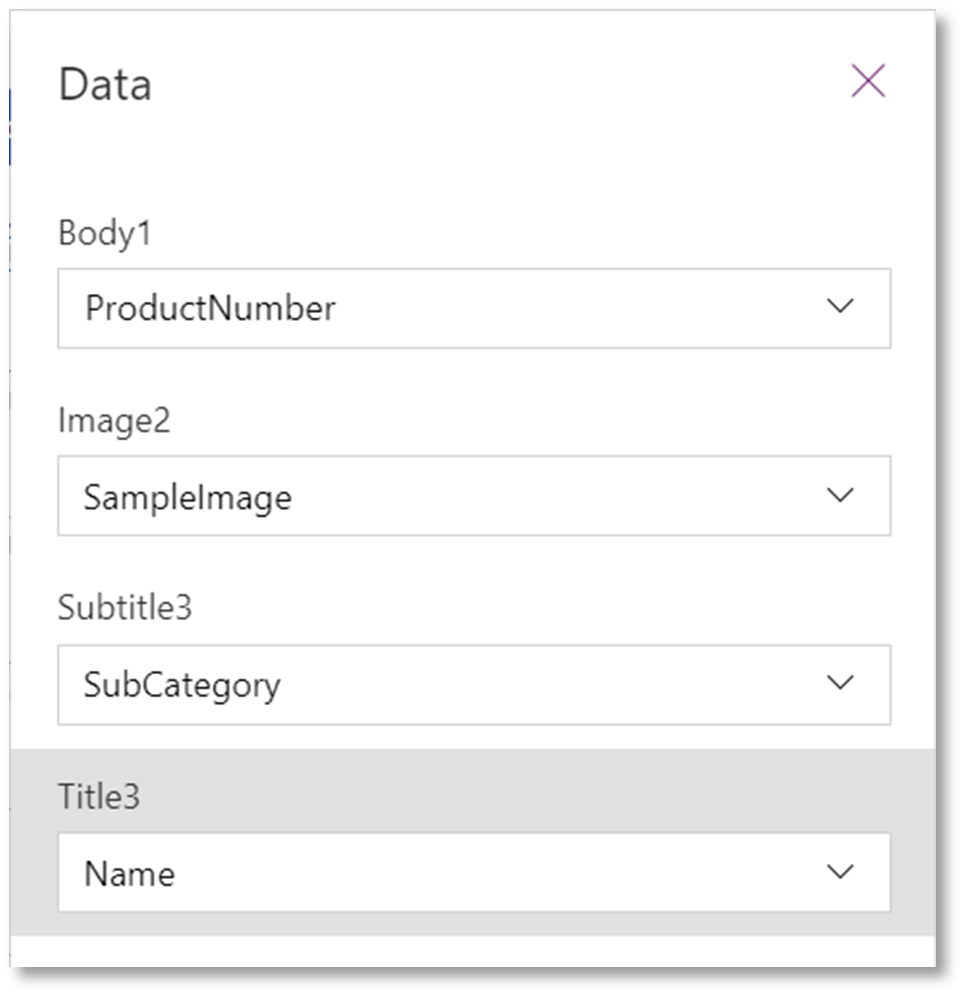
For the Image, you would typically reference an image field in your data (e.g. a url to the image location on a web server). For our sample, we’re going to upload some icons and then use these in the image field to indicate the Category that the product is in.
To upload images to your App, click on the Media menu item on the left hand side of the screen and then click on Upload and select 4 icon image files (one for each of the Categories in our dataset).
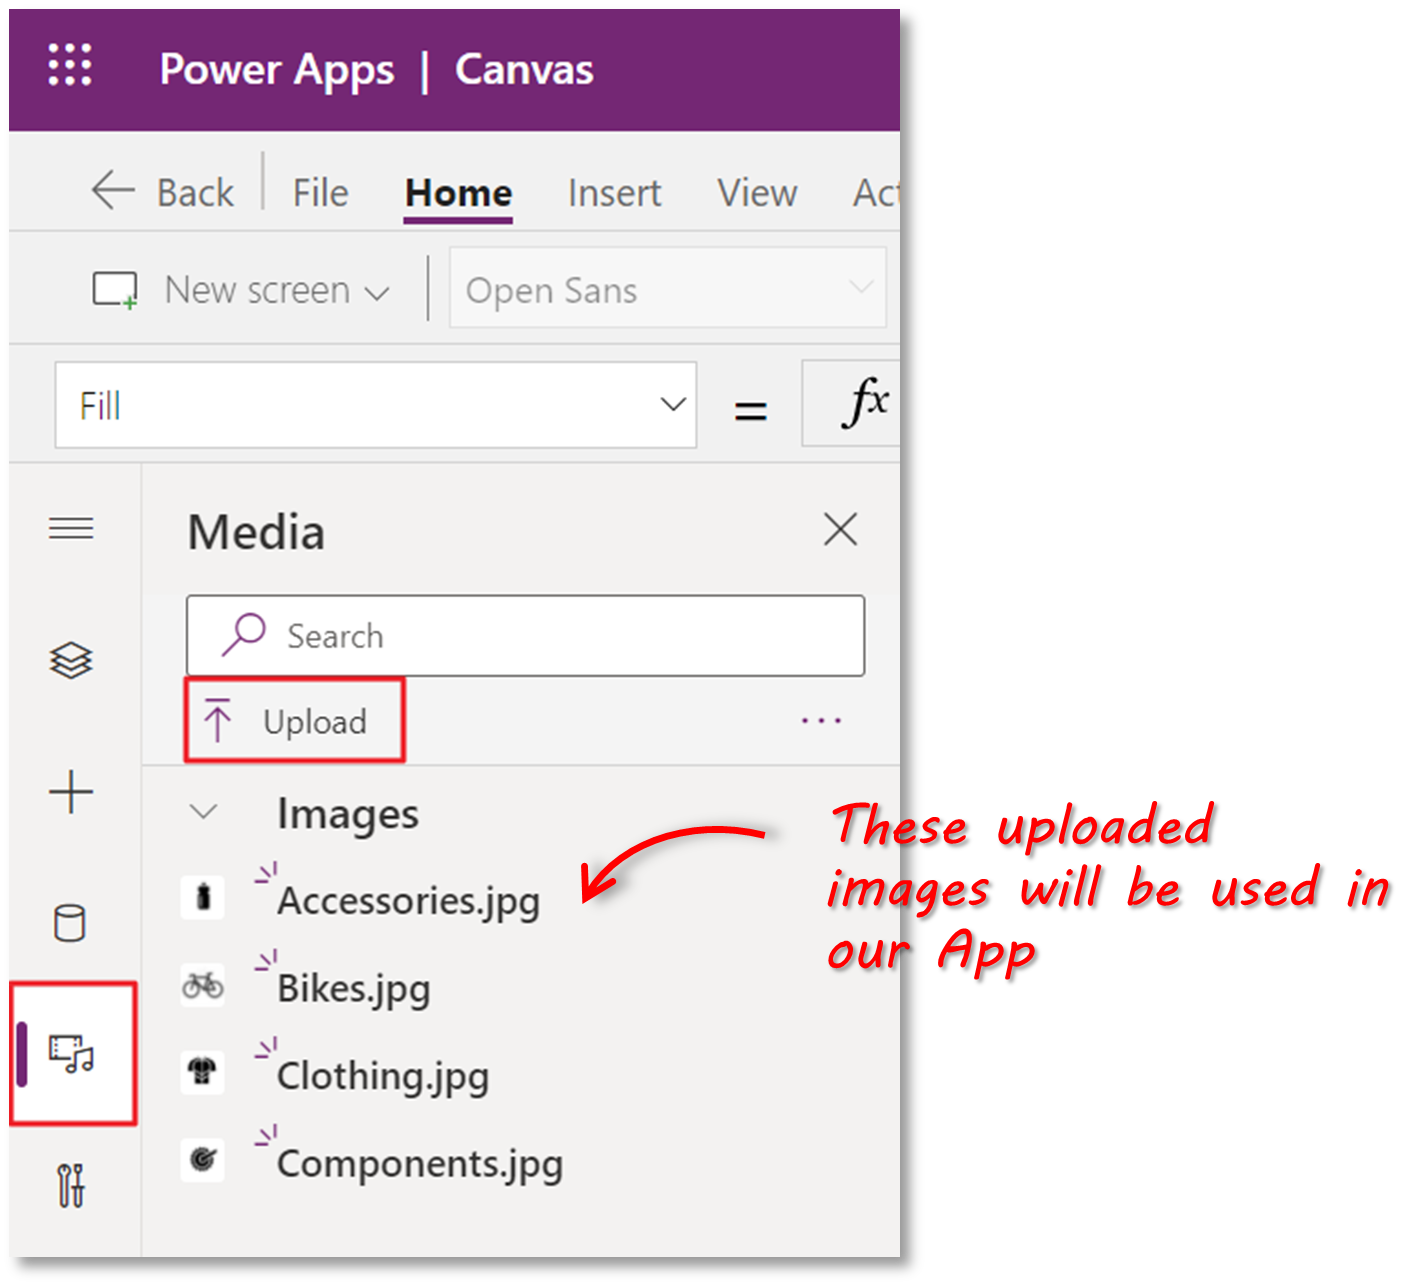
We want an image to be displayed for each record displayed in the BrowseGallery according to the value of the Category field. In other words, if the product is in the ‘Clothing’ category, we want the Clothing.jpg image to be displayed. To do this we’ll use a Switch formula in the image field.
Go back and select the BrowseGallery control, select the Fields properties and then select the Image field. You can see that when the Image field is selected, the formula bar simply displays the SampleImage placeholder.
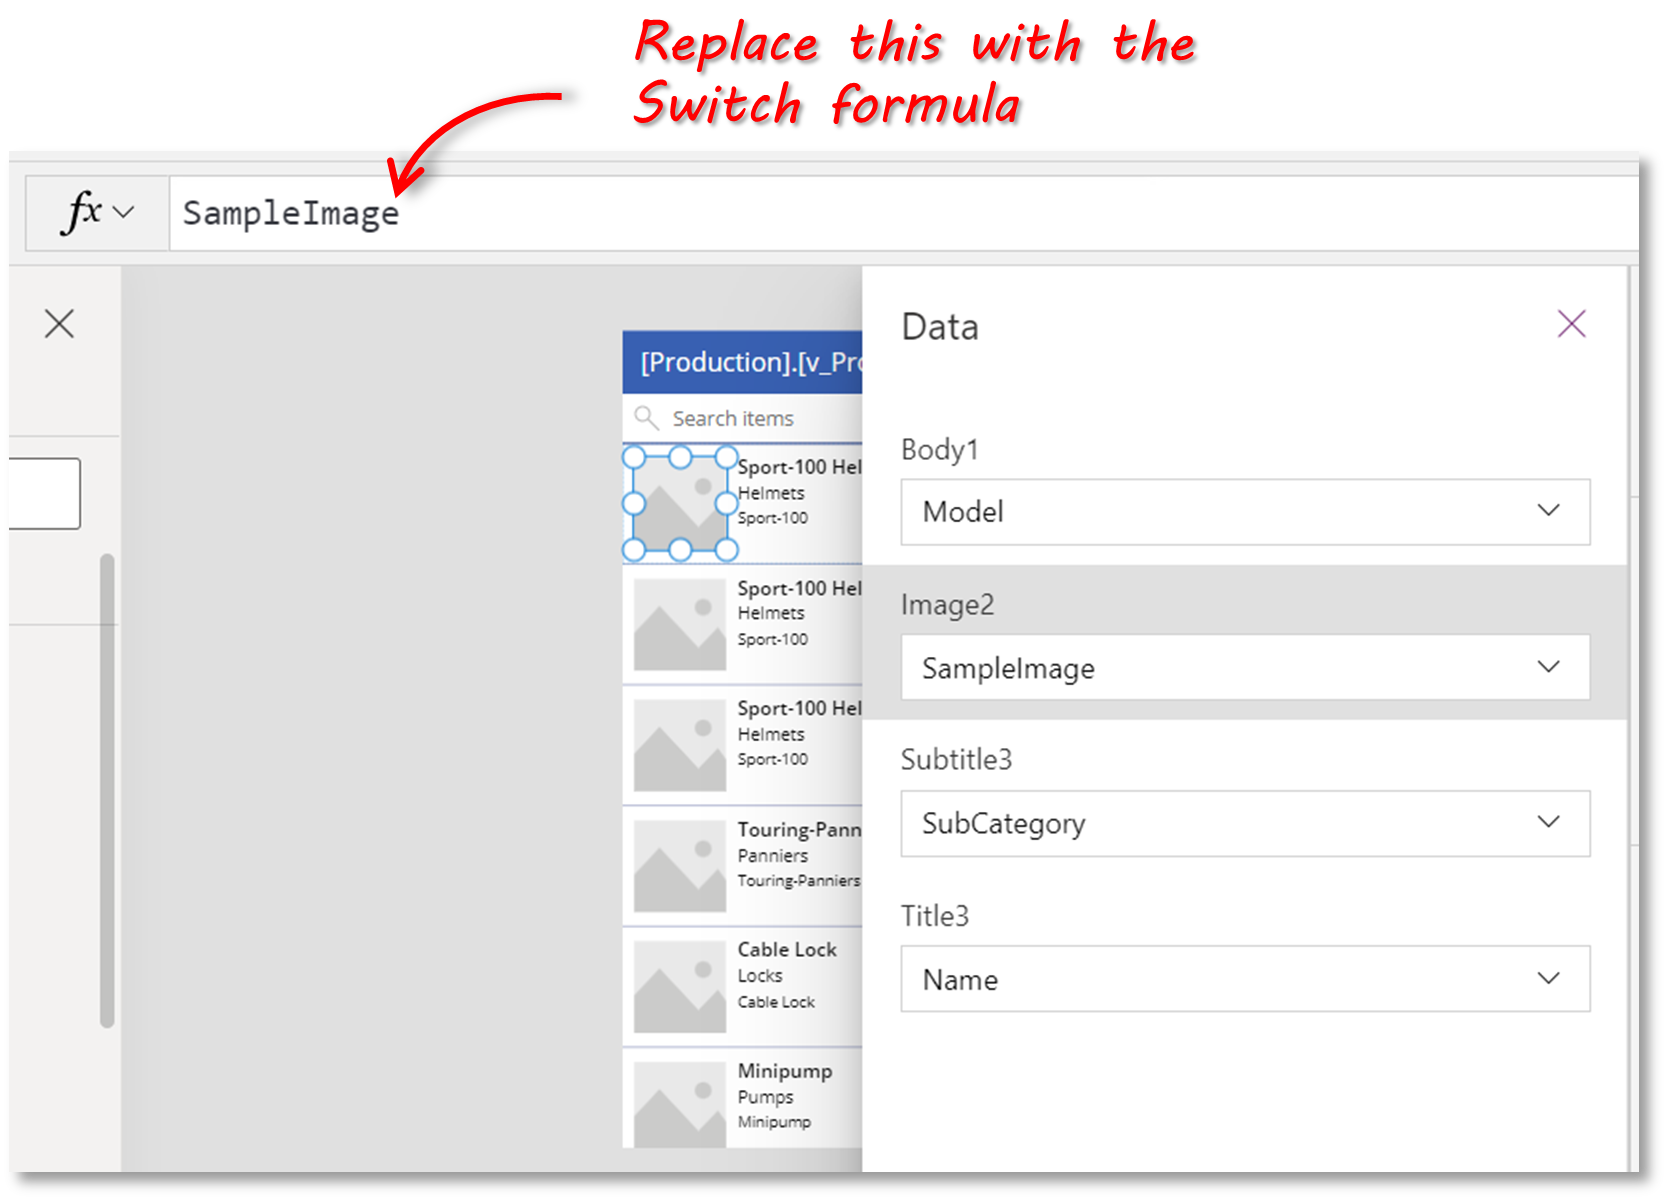
We’re going to replace that with our Switch formula – paste the following in the formula bar:
Switch(
ThisItem.ProductCategory,
"Accessories",
Accessories,
"Bikes",
Bikes,
"Clothing",
Clothing,
"Components",
Components
)
The Browse screen should now look like this:
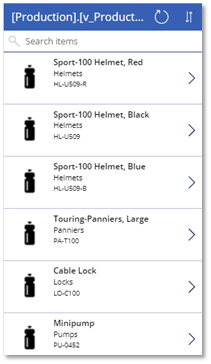
You may have noticed that the products in the gallery list seem to be ordered in a strange way. Let’s check that out now and fix it.
Click on the BrowseGallery control and in the Properties pane on the right, click on the Advanced tab and then find the Data > Items field.
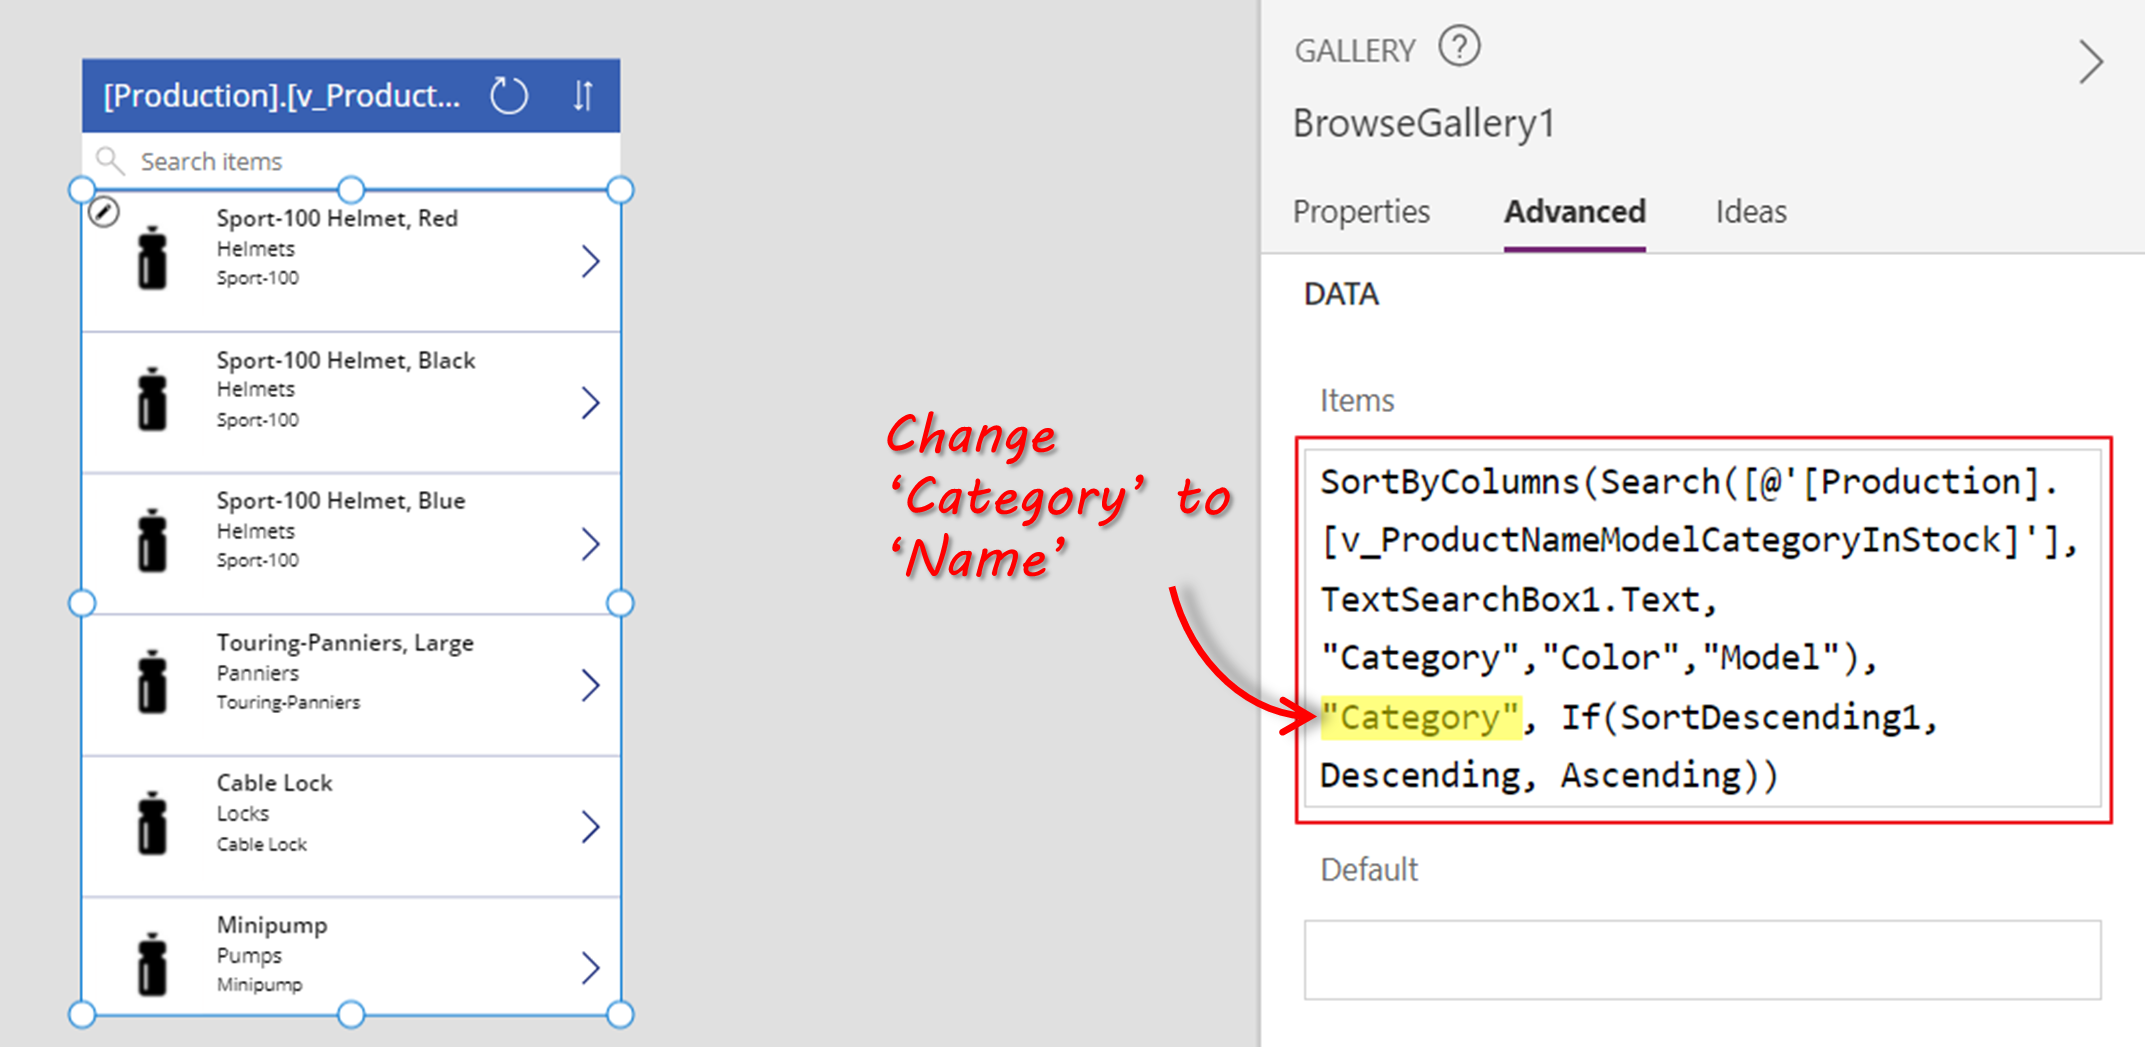
You can see that there is a nested formula that defines how the items are sorted and which fields to include when a search is performed. We’re going to change the field that the SortByColumn is specifying – from “Category” to “Name”.
Next, we’re going to change the screen title – by default, it shows the name of the table in your data source. To change it, click on the ‘LblAppName’ label control and change its Text property to “AW Product List”.
Finally, we’re going to add another label onto the BrowseGallery control to display the item price. Select one of the existing controls within the BrowseGallery control and then click on Insert > Label.
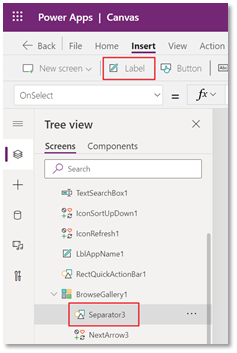
Select the new label and enter the formula shown below into the formula bar. This will display the ListPrice field in the correct currency format.
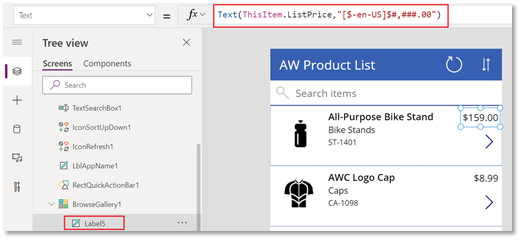
Step (4): Customize the Detail screen
The Detail screen is displayed when a user clicks on the ‘more details’ arrow on a record in the Product List view. This is the default layout that gets created when the App is generated:
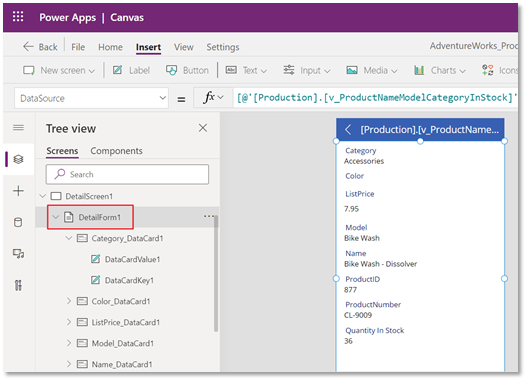
The DetailForm control contains a series of Data Cards that each contains a label and value field.
The only changes we’re going to make to this screen are to change the screen title (to “Product Details”) and the order that the fields are displayed. To change the fields and display order, select the DetailForm control, and in the Properties pane, drag and drop into the preferred order.
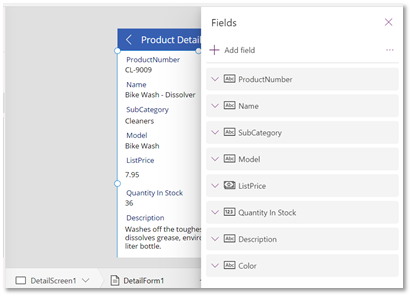
Step (5): Previewing and Publishing the App
You can preview your app from within the design environment by clicking on the Preview button.
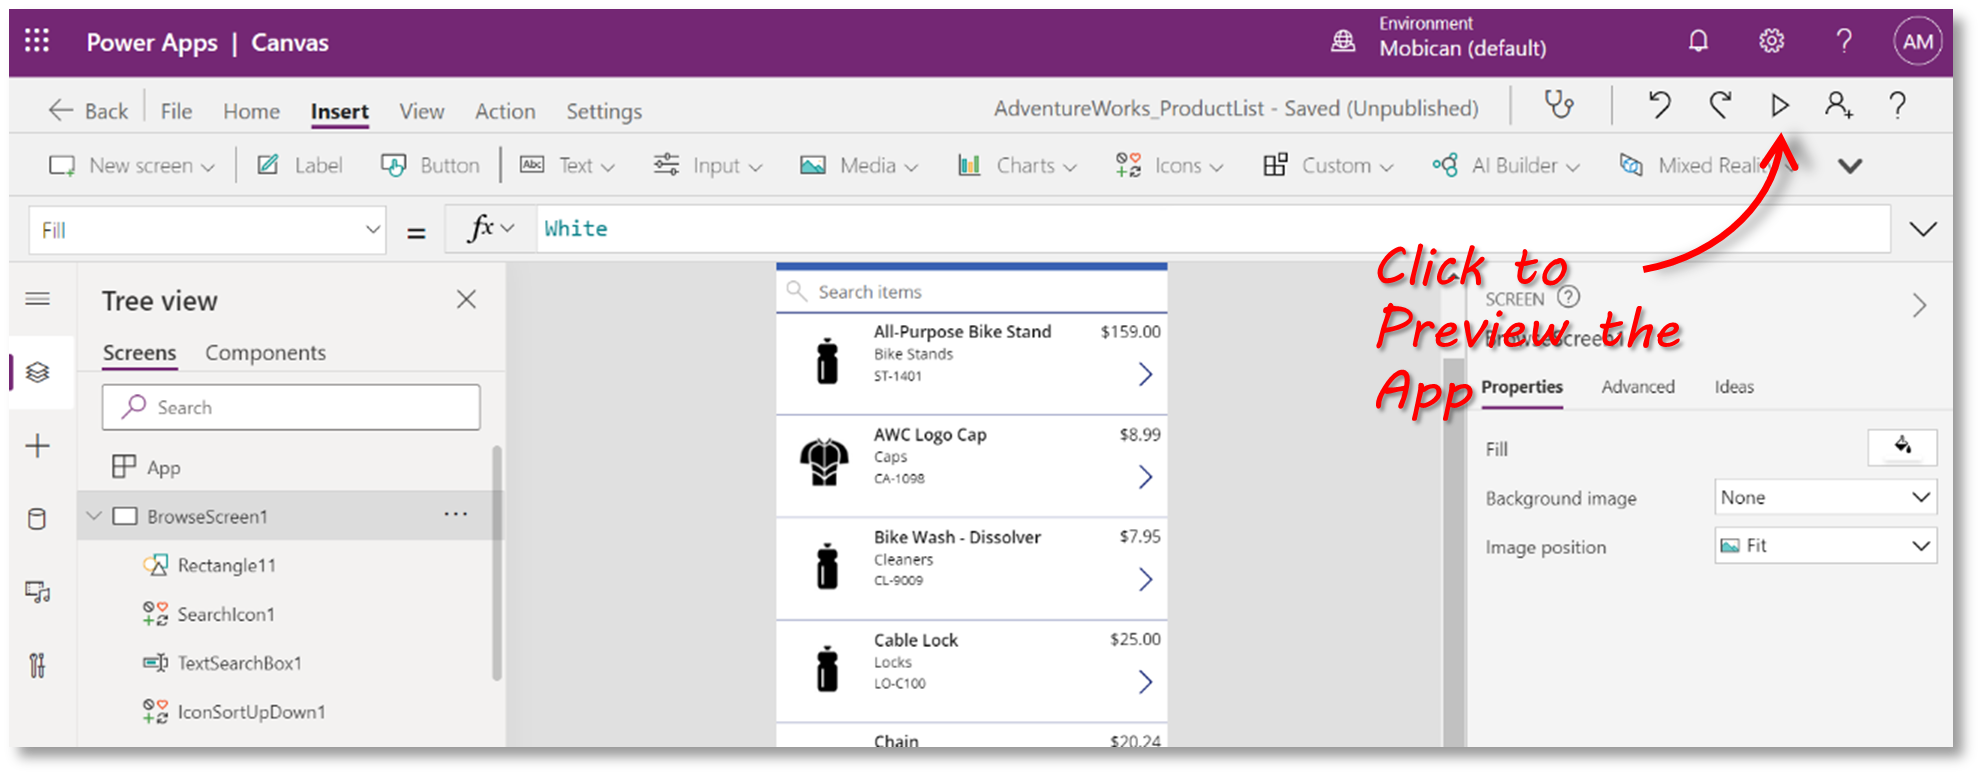
The app will load in an emulator, which allows you to try the functionality as if you had it installed as an actual mobile app.
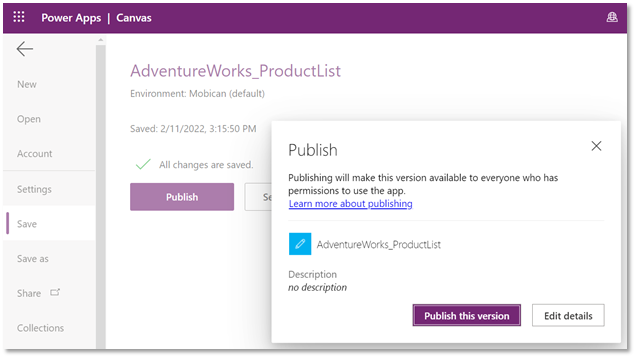
Once you are happy with the App, you can Publish it. Whenever you save changes to a canvas app, you automatically publish them only for yourself and anyone else who has permission to edit the app. When you finish making changes, you must explicitly publish them to make them available to everyone with whom the app is shared.
From Power Apps Studio, click on File > Save and then click on Publish, and then ‘Publish this version’.
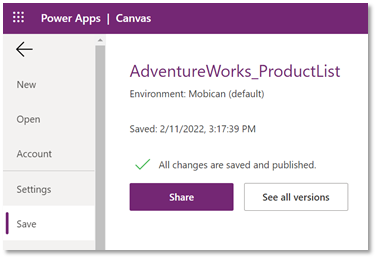
Once the app has been published, you’ll be prompted to share it with other users.
Considerations for using Power Apps
The app that we’ve just gone through is a very simple example. As you start building larger and more complex apps, there are some things to consider when choosing to use Power Apps or an alternative.
Ease of Use
It’s very easy to get up and running with Power Apps as our example showed. However, there is a steep learning curve once you need to start adding more complex functionality (which is inevitable in most cases!). On the plus side, the Microsoft documentation is good and there is a large user community, so there is always help at hand.
Limited Integration beyond Microsoft
Microsoft has obviously built Power Apps to be highly integrated with its platform. If you are already heavily invested in Microsoft products like Sharepoint and Office 365, then this probably isn’t a limitation for you. However, if your organization uses a more varied stack, then you may find the integration you need is not available or not up to scratch.
Size Limits
Power Apps can only retrieve records from your data source up to a certain limit. At the time of writing, this is 2000 records. There are ways to work around this, but they are complex. Just be aware that if you create a simple app that connects to an Excel file, Sharepoint list, or SQL table with more than 2000 rows, you’re not going to see all your data.
Summary
In this article, we answered the question “What is Power Apps?” by providing a brief overview of how it works and then running through an example.
The example app simply showed us a product catalog and provided some basic product information, but it highlighted some of the key principles of creating apps using Power Apps. There are a lot more things that you can add to your apps such as actions and workflow to cater to more advanced scenarios.
There are some aspects of Power Apps that need to be considered before you decide to start using Power Apps, and we discussed some of the main ones.
Do you use SQL Server in your organization and want an easy way for users to view and edit data? Try the SQL Spreads Excel Add-In – an easy way to manage your SQL data from within Excel.


