Intro to Tree Filters
Tree Filters are available in SQL Spreads Pro and above

Tree Filters in SQL Spreads makes it possible for end users to select to import a filtered selection of the rows from the table in SQL Server.
- Tree Filters are "data-driven" and generated from the data in SQL Server by entering a small SQL query that generates the tree structure from the data in the database.
- Tree Filters are created per Excel workbook. Only the relevant Tree Filters for the selected worksheet will be displayed.
- To apply the filter selection to your data, you will need to add a Designer filter in the SQL Spreads Designer.
- When a user makes a new selection in the Tree Filter, only the data in that sheet will be reloaded. All of the other sheets will remain unchanged.
Video - Tree Filters: How End-users can filter data loaded from SQL Server

Creating a new Tree Filter
To create a new Tree Filter:
-
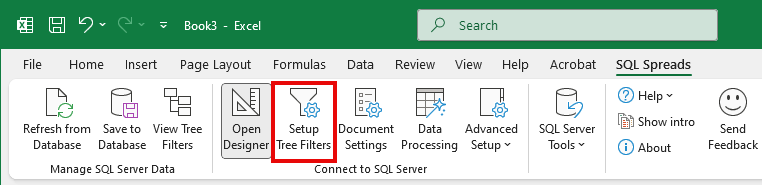
In the SQL Spreads tab in Excel, open Design mode and click the Setup Tree Filters button:
-
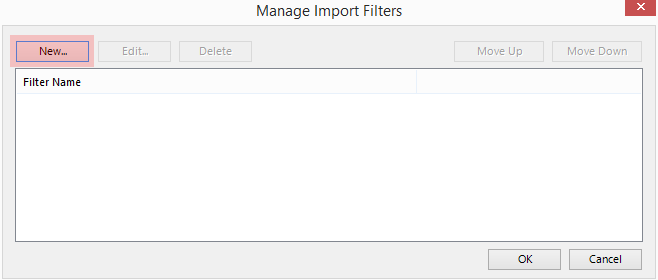
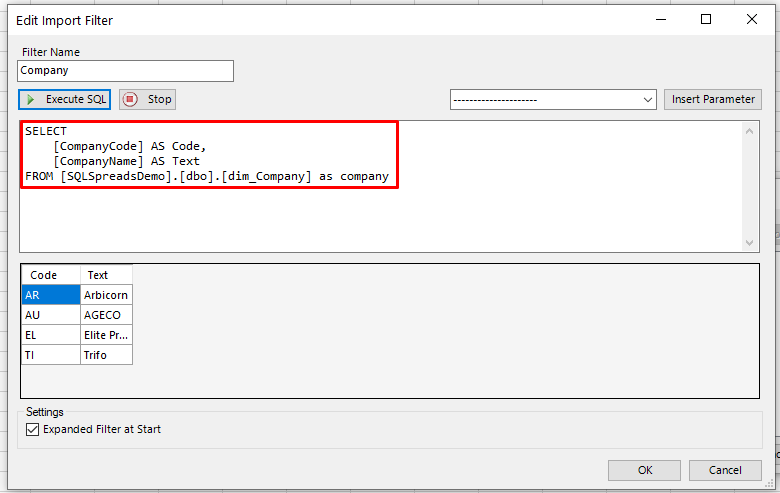
The Manage Import Filters dialog will be shown. Click New to bring up the Edit Import Filter dialog.
-
Enter your filter SQL query for generating the filter items. You can test run your query by clicking the Execute SQL button.
The Tree Filter SQL query must return two columns; Text and Code where Text is the filter items shown to the user and the Code can be used as a key value when filtering the rows to load from the database.
-
Click OK to go back to the Manage Filter dialog and then click OK again.
-
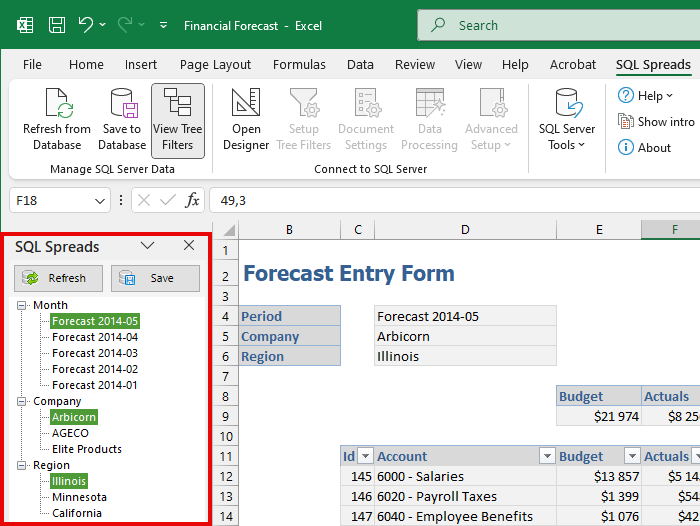
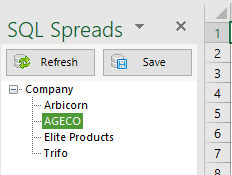
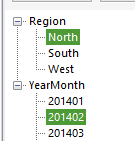
The Filter Selection Panel will be shown and the items in your new filter will be loaded. Each separate filter will be shown as a top node in the Filter Selection Panel. If you create several filters, the user has to select one item in each filter to import the data.

Filter the data based on the selection in the Tree Filter
To filter the data loaded from SQL Server you will have to add a Designer filter in SQL Spreads. This filter limit the number of loaded rowsbased on the selection in the Tree Filter.
-
Create your Tree filter using the steps above. Your filter items will be shown in the left side panel in Excel.
-
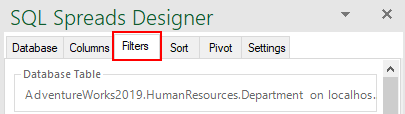
Go to the Filters tab in the SQL Spreads Designer:
-
Create a new Custom SQL filter:

-
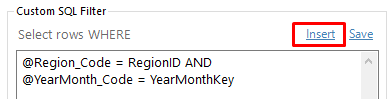
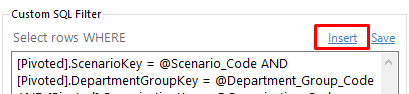
In the Custom SQL Filter field at the bottom, add a filter query in the same format as a WHERE clause in a standard SQL query.
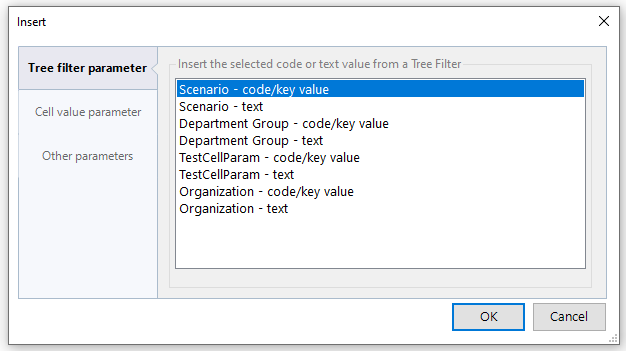
To get the parameters containing the selected values in the Tree filter, click the Insert link...
-
... and select the Tree Filter parameter to use:
-
Test your filter by selecting one of the Tree Filter selections on the left side panel and make sure that your specifically filtered data is being loaded correctly.
All Tree Filters will be visible when the SQL Spreads Designer is open. The active Tree Filters for that particular sheet will be enabled while the rest are grayed out. This is useful for the Designer when setting up the document.
Once the Designer is closed, only the active Tree Filters for that particular sheet will be visible.
A Data Editor does not have access to the SQL Spreads Designer. Therefore, they will only ever see the active Tree Filters for the specific sheet that they have selected.
Naming of the Tree Filter parameters
For each Tree Filter there will be two parameters available to use in your filter query; the Text shown in the Tree filter and a Code parameter that can be used to store a key value that is not visible to the user.
To quickly insert a Tree Filter parameter or a Cell parameter, click the Insert button above the filter text area:
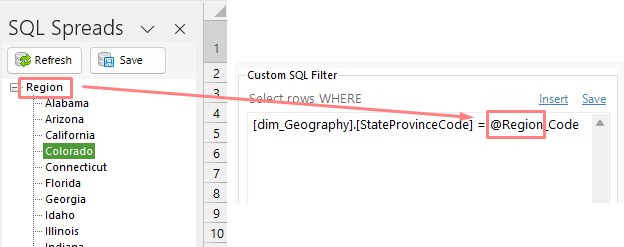
Each filter's parameters are named with the Filter Name plus “_Code” and “_Text”, eg for a Tree filter named Region the parameters will be:
@Region_Code
@Region_Text
Filter Settings
Expand at Startup
To automatically expand the values in a filter when the filter is loaded, click the Settings button, then the Setup Filters button. Click New or Edit and then check the Expanded Filter at Startup at the bottom of the dialog.

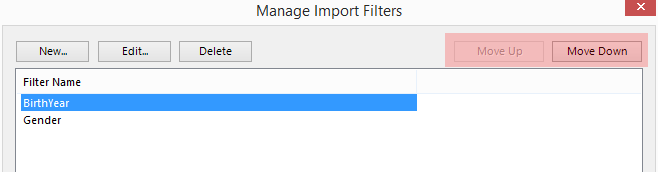
Filter Ordering
When using multiple Filters you can order the filters in the filter pane by changing the order of the Filters in the Manage Import Filters dialog. To change the order of a filter, select the filter and click the Move Up or Move Down button.