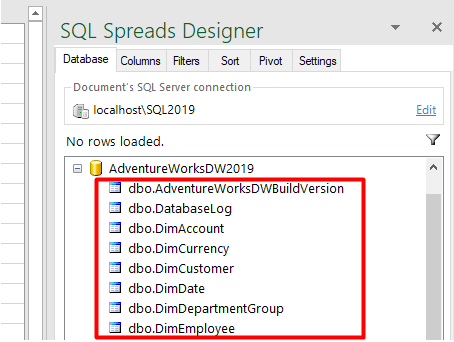
When SQL Spreads is connected to SQL Server, the available Databases, Tables, and Views will be shown in the Database Tab in the SQL Spreads Designer.
Select a Table or View in the list in the Database tab to load it into Excel:
To load multiple tables into the same Excel document, switch to an empty Worksheet in Excel and select the second table there.
To update data in SQL Server Views you will need SQL Spreads Pro or a higher plan
Quickly filter your databases and tables
If you have large numbers of databases and tables in your SQL Servers it can be hard to find a specific table or database.
SQL Spreads has a database and table filtering feature that makes it really easy to find the database and table you are looking for.
Filter the list with databases and tables
-
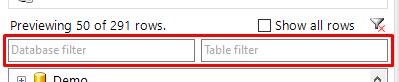
Click the filter icon in the Database tab in the Designer to show the filter fields:

-
Enter a filter for either the databases or the tables to be shown, or both if needed:
-
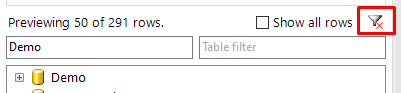
The tree-list with databases and tables will be instantly updated to reflect your filter criteria.

SQL Spreads will remember the last entered filter criteria and will automatically show the filtered list next time you open Excel.
To clear the filter and show all databases and tables
To clear the filter and show all databases and tables, click the filter icon with the red cross:
Selecting Key columns for the table
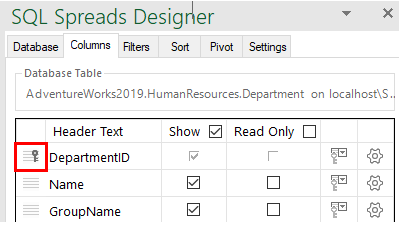
SQL Spreads requires a unique key for each row in the selected Table or View. The key can be a single column or a combination of multiple columns.
If the key columns in the database are either an Identity column or a Primary Key column, SQL Spreads will automatically detect these columns as key columns.
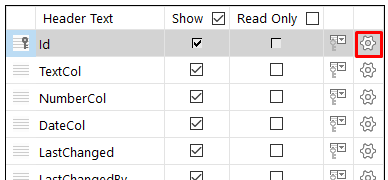
The key columns are marked with a key symbol in the left-side row header:
When you load a new table into SQL Spreads, and the key column(s) are not automatically detected, you will see a key selection dialog to manually specify which columns are the key column(s).
There cannot be any duplicate data in the key columns that you are selecting. If there is no combination of key columns that is allowing you to continue, check that there are no duplicates in any of those rows in your data in SQL Server and if there are, remove the duplicates before trying the combination of key columns again.
Manually selecting the key columns
To manually select the key columns:
- Click the right-side cog in the Columns tab:
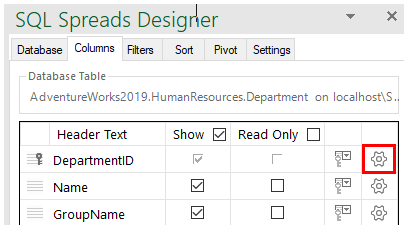
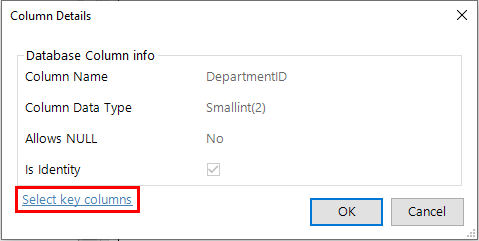
- Then click the Select key columns button:
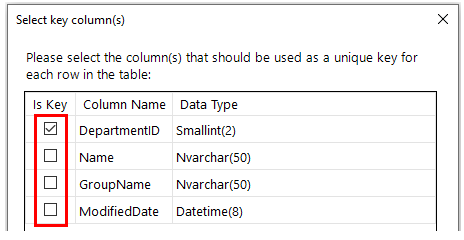
- You will now see the Key selection dialog and can check the columns that are your key columns:
Working with SQL Server Views
SQL Server Views can be used in SQL Spreads Pro and above

Updating data in SQL Server Views are, in most cases, similar to updating data in SQL Server Tables.
Views with columns from joined tables
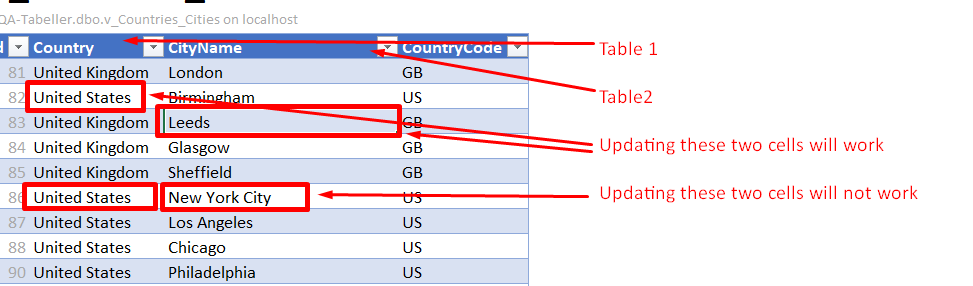
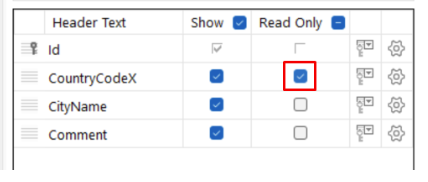
When updating data in Views that fetch their data from joined tables, there is a restriction that you can only update the data from one base table in each update. SQL Spreads will automatically detect the joined tables in a View and set the columns from the first base table to editable and the other columns to Read-Only.
To make the columns from another base table editable, simply uncheck the Read-Only checkbox for a column from the other base table in the Columns tab in the SQL Spreads Designer.
You can only insert new rows into the base table of a joined view. The base table is the table immediately following the FROM clause in the View definition.
Updating all columns in a View with columns from multiple Joined tables
There is a workaround that you can use to update all columns:
SQL Server allows updating columns from several joined tables in a View in the same uone update as long as you only update columns from one joined table on each row.
This is a quick explanation how that works:
By default SQL Spreads only makes columns from one View editable when working with a Joined view. But you can turn that off and then get the behaviour described above.
Uncheck the Read-Only checkbox for one of the columns in your View:
In the dialog to select which base table to update, check the checkbox at the bottom of the dialog:
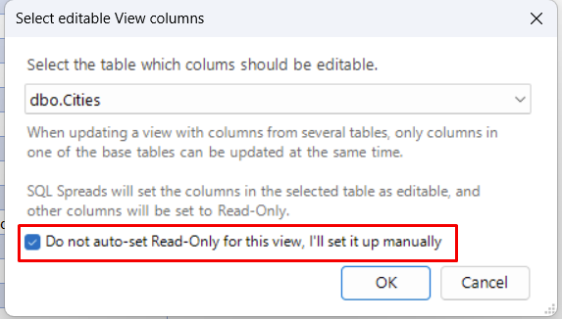
Now you can update all columns in the View.
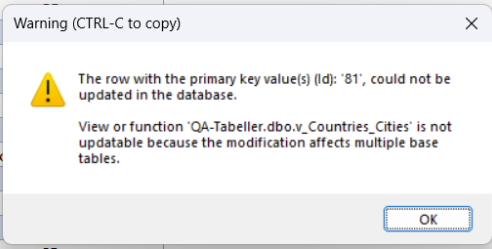
If you happen to update two columns from different base tables on the same row, SQL Server will give you this message when you are trying to save the data back to SQL Server:
Inserting rows into a view with an Identity key column
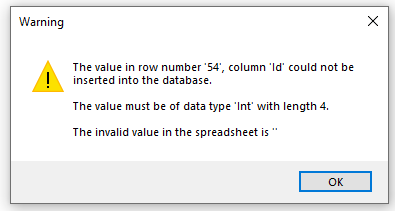
When working with a view where the underlying table's key column is an auto-incrementing identity key column, SQL Spreads cannot auto-detect that the column is an identity key column.
When you try to insert new rows into such a view you will see the following message:
To specify that the key column is an identity key follow these steps:
- Click the small cog on the right side in the columns tab to bring up the Column Details dialog
- Check the checkbox Is Identity
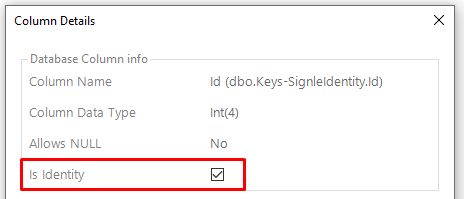
- Click OK
You should now be able to also insert rows into the view.
Preview of 50 rows in the SQL Spreads Designer
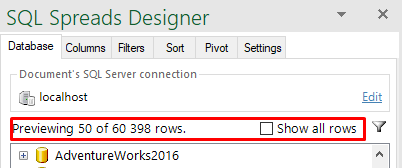
When the SQL Spreads Designer is opened, SQL Spreads will preview only the first 50 rows in the table.
You can turn off the Preview and also see the total number of rows in the table at the top in the Columns tab in the SQL Spreads Designer.
Turn off the Preview of 50 rows
To turn off the preview in the SQL Spreads Designer and show all rows, click the Show all rows checkbox.
When you close the Design mode and click Refresh, all rows from the table will be loaded into Excel.
Data Editor mode users will automatically see all data regardless of the Preview configuration in the Designer.