Intro
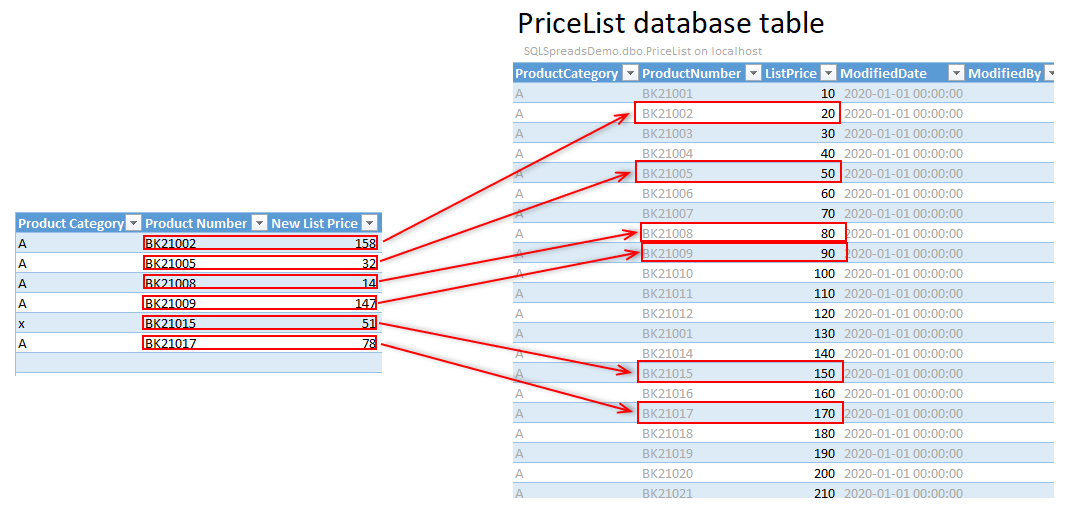
We are often asked if there is an easy way to take a list of database changes in Excel and update those into a larger SQL Server database.
An example would be to update the prices for say 100 products in a database that holds a few thousand product rows. You could manually look up each product by the product key, change the price and maybe a few other columns and then repeat this for your 100 products. This is a time consuming procedure, and if you already have all the updates in a list in Excel, you can use this solution together with SQL Spreads to automatically update the products in the database.
We have created this demo solution that you can download and configure to use with your own SQL Server table to do an automatic matched update of changes into a larger database.
Features
- Supports matched updates and insertion of rows
- Detects duplicates in the imported rows
- Color coding for matched, non-matched and duplicate rows
- Import actions can be controlled per row
- Row-wise import status is shown in a separate column
- Configuration sheet to specify how the import should be done without having to write any code
Prerequisites
- The matching part of the solution uses VBA (the file is a macro-enabled .xlsm Excel document) so you will need to enable macros for this file.
- The solution requires that you have the SQL Spreads Excel Add-In installed.
- You do not need any coding skills to use this solution.
Performance
This solution will match and import 500 rows of data in a list in Excel into a database with 10,000 rows in about 3 minutes.
If you need a faster solution we also have another demo solution that uses a SQL query instead of VBA to match the rows. This will drastically increase the performance but is a bit more complex to setup.
Getting started with the Matched update solution
You can download and play around with this demo file without connecting it to SQL Server. Once you are familiar with how the matched update works, you can move on to the next section which describes how to configure and setup the demo file to work with your SQL Server tables.
To get started, follow these steps:
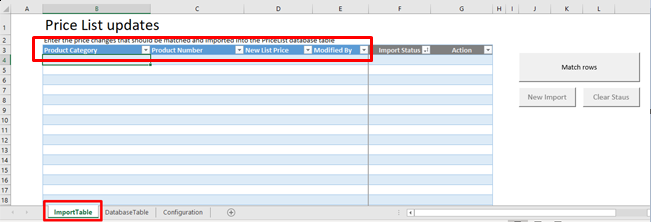
- First, download the solution demo file from here. This solution file contains the following three sheets:
- ImportTable - the sheet where you enter the changes that should be imported into SQL Server
- DatabaseTable - this is the sheet that holds a copy of your SQL Server table. When you run the Match Rows, this sheet will be updated with the changes from the ImportTable sheet and will later be saved back to the SQL Server table.
- Configuration - the setup sheet to configure how columns are matched and a few other solution settings.
- Open the file and make sure that you enable Macros:

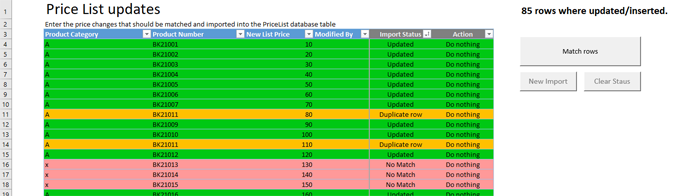
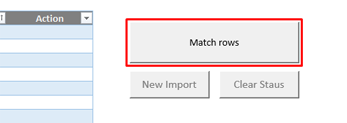
3. Click the Match rows button to try to match the rows in the ImportTable sheets with the rows in the DatabaseTable sheet.

-
All rows except 11, 14 & 16-18 were matched and updated in the DatabaseTable sheet. Row 11 & 14 were detected as duplicates and for row 16-18 there was no matching key found in the database.
-
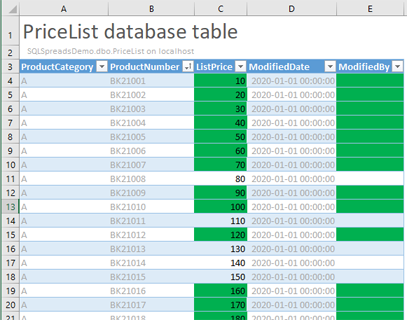
If you switch to the DatabaseTable sheet you can see which rows were updated:
-
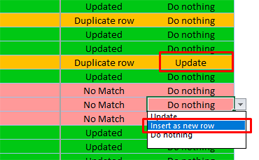
To fix the import issues, switch back to the ImportTable sheet. Set the Action for the Duplicate row to use to Update. For the unmatched rows, either correct the row and set the Action to Update, or insert the row into the database by setting the Action to Insert as new row.

-
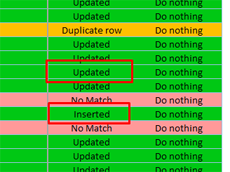
Re-run the matched import by clicking the Match rows button again. You can now see that the Status column for the two updated rows has changed to Updated and Inserted.

-
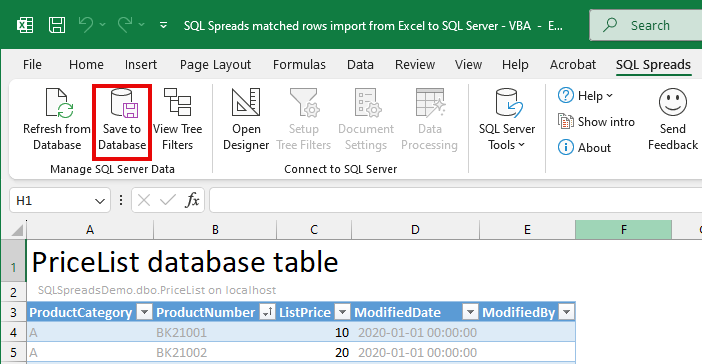
When you have connected this demo to your database, you will switch to the DatabaseTable sheet, review the changes and click the Save to Database button to write the changes back to SQL Server:
-
To start a new import click the New Import button. This will clear all rows in the ImportTable sheet and all coloring in the DatabaseTable sheet.
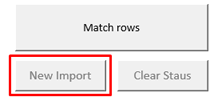
-
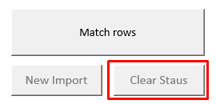
To keep the import rows, but clear the Status and Action columns and all color coding in the document, click the Clear Status button:
Modify the solution to work with your SQL Server table
The solution is built with the goal that you should be able to customize it for your SQL Server table without changing any of the VBA code.
Follow these steps to configure the sheet to import data into your SQL Server table:
-
The first thing you need to do is to load your SQL Server table into a new sheet in Excel using the SQL Spreads Designer. Head over to the SQL Spreads tab in Excel, click the SQL Spreads Designer button and select your table in the list on the right-side:
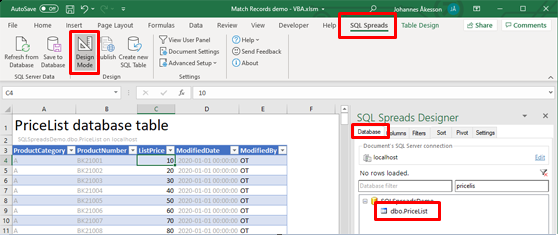
Your table will now load into a new sheet in Excel. -
Next you will have to tell which sheet will hold your database rows. By default the solution looks for the SQL Server table in the sheet named DatabaseTable.
You can get the solution to use the sheet with your database in two ways;
- Alt 1: Delete the existing DatabaseTable sheet and rename the tab with your database from step 1 above to DatabaseTable:

- Alt 2: Switch to the Configuration sheet and for the parameter DatabaseTableSheetName, replace the text DatabaseTable with the name of the sheet that holds your database:
-
Modify the columns in the ImportTable sheet to include the keys and values that you will need to import your data into SQL Server. Be aware that you will need to keep the Status and Actions in the last two columns.
-
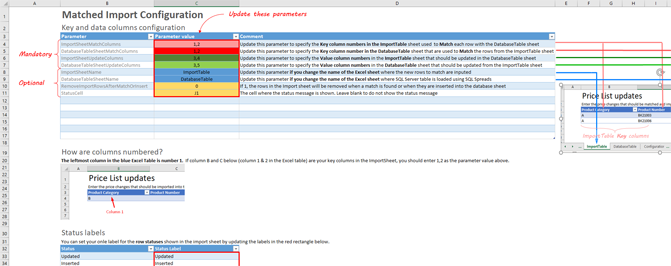
Head over to the Configuration sheet. This is the place where you specify which columns to use to match and update your imported data with the SQL Server table.
-
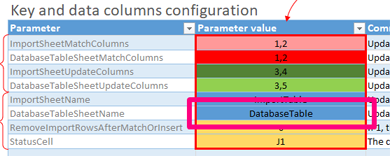
The first thing to configure is which columns are used to match the imported rows with the database rows (the key columns):

-
The first parameter ImportSheetMatchColumns specifies which columns in your Import sheet are the key columns.
-
The second parameter ImportSheetMatchColumns specifies which columns in your Database sheet are the key columns.
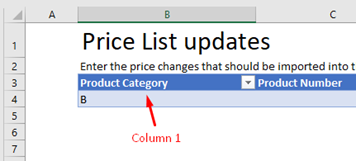
The left most column in the Excel Table (blue background) is number 1. If Excel column B and C below (column 1 & 2 in the Excel table) are your key columns in the ImportSheet, you should enter 1,2 as the parameter value above.
- Now you will specify which columns are your value columns that should be updated in the database.

- The first parameter ImportSheetUpdateColumns specifies which columns in your Import sheet should be updated in the database.
- The second parameter DatabaseTableSheetUpdateColumns specifies which columns in your Database sheet should be updated with the value from the ImportTable sheet.
-
You have now configured your key and value columns and are now ready to do the first import test. Switch over to the ImportTable sheet and add a few rows of data to import. Then click the Match rows button to try to match the new rows in the ImportTable sheets with the rows in the DatabaseTable sheet.
-
You will see the result both in the Import Status column and with the coloring.

-
If you switch to the DatabaseTable sheet you can see which rows were updated:

-
To fix any import issues, switch back to the ImportTable sheet and update the values and set the appropriate Action for each row:
-
Re-run the matched import by clicking the Match rows button again. You can now see that the Status column is updated:
-
Now switch to the DatabaseTable sheet, review the changes and click the Save to Database button to write the changes back to SQL Server:
You must be on the DatabaseTable sheet to save your changes to SQL Server.
-
To start a new import click the New Import button. This will clear all rows in the ImportTable sheet and all coloring in the DatabaseTable sheet.
-
To keep the import rows, but clear the Status and Action columns and all color coding in the document, click the Clear Status button.
If you need any help to get the solution up and running, please send an email to support@sqlspreads.com