Intro
The VBA-based demo solution to import a list of changes in Excel into a table in SQL Server can import maybe a few hundred rows per minute.
If you need to import a larger number of rows, you can use this demo solution that uses a SQL query to do the matched import.
This solution can import 500 rows into a table with 10.000 rows in less than 0.5 seconds.
Features
- Matched import of new updates.
- Optimized for larger databases and number of rows.
- Supports insertion of new rows.
- Prevents duplicates in the imported rows.
- Does not require any VBA code
Prerequisites
- You will need to be authorized to create a new table in SQL Server where the updates are temporarily stored.
- You will need to make smaller adjustments to the matching SQL query by replacing the demo table and column names with your table and columns names.
- The solution requires that you have the SQL Spreads Excel Add-In installed.
How to create the solution
This solution will use a stage table in SQL Server where you import the list with changes from Excel using SQL Spreads.
When the changes are imported into the stage table in SQL Server, a small SQL script will do the matching and updating of the changes into your final destination table.
1. Create a new Excel sheet where you enter the changes to be imported into SQL Server
This sheet should include:
- The Key column(s) used to match each imported row with the row in SQL Server
- The value column(s) that should be updated in SQL Server
- A couple of rows of example data
Please make sure that your data is in an Excel table. If not, select a cell within your data and press CTRL + T to create an Excel table.
This is how this Import sheet looks in our Price List example:
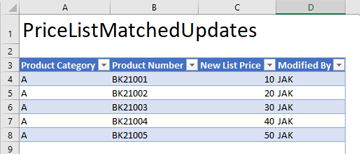
In our example the columns 'New List Price' and 'Modified By' should be updated in the database, and the key columns used to match the rows are the 'Product Category' and 'Product Number' columns.
2. Create the stage table to temporarily store the updates
We will now use the Excel table from step 1 to create the stage table in SQL Server, using the SQL Spreads Table Creator.
-
Go to the Excel sheet created in section 1 above.
-
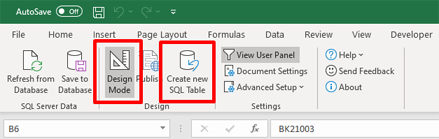
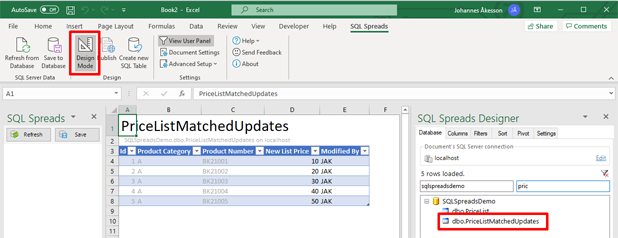
Head over to the SQL Spreads tab in Excel and click the Design Mode button and then the Create New SQL Table button:
-
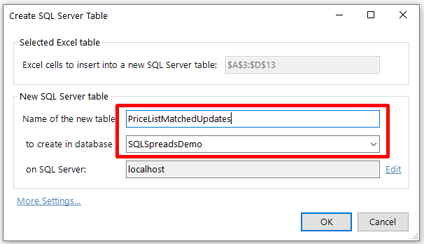
The Create SQL Server Table dialog will open. Type the name of the stage table and select in which Database the table should be created:
-
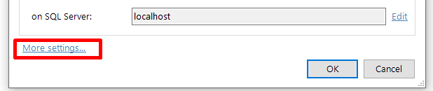
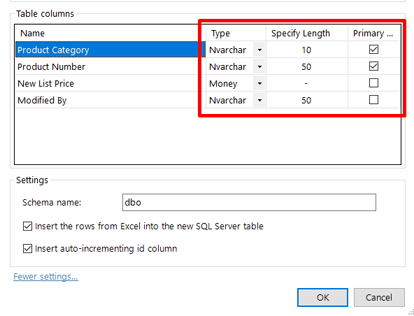
Click the More Settings... link-button to show the part of the dialog where you can adjust the data types.
-
Adjust the data types and the length for each of your columns from Excel. These types and length will be used to validate the data entered into Excel so it is recommended to use the same data types as in your final destination table.
-
If you check the Primary Key checkboxes for your key/match columns, you will get a warning whenever duplicate rows are entered into the import sheet.

-
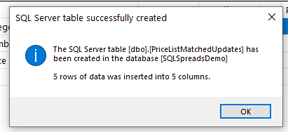
Click OK and you should see a confirmation that the table was created in SQL Server:
-
Click the Design mode button twice to close and reopen the Design mode. This will reload the tables and you should see your new table in the table list in the Designer on the right side.
Select your table in the list and it will be loaded into Excel:
3. Add the SQL query to match the rows into the destination table
We have now created the stage table in SQL Server and an Excel sheet where we can enter the updates that should be imported into your destination table in SQL Server. We will now create a small SQL script that will take the rows from the stage table and update those into the destination table.
To run the script automatically as soon as any new rows are saved into the stage table, we use a post-processing feature in SQL Spreads called Post-Save SQL query. The Post-Save SQL query will run a SQL query immediately after the data from Excel is saved into a table in SQL Server.
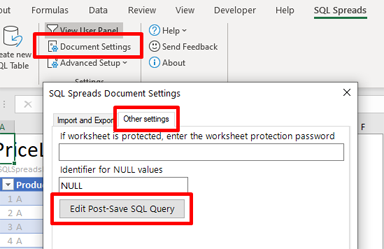
To enter the SQL script, go to the SQL Spreads tab and click the Document Settings button. Then select the second tab Other Settings and click the Post-Save SQL query button to bring up the dialog to enter the Post-Save SQL query:
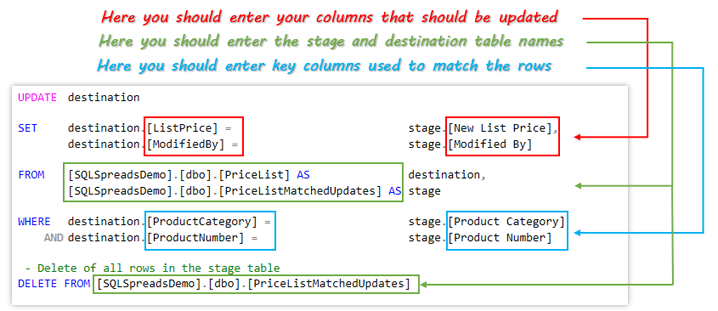
The SQL query that will match the rows looks like this:
UPDATE  destination

SET     destination.[ListPrice] =         stage.[New List Price],   -- Specify how the columns in destination table (PriceList) should be updated by changes from Excel, stored in the stage table (PriceListMatchedUpdates)
        destination.[ModifiedBy] =        stage.[Modified By]

FROM    [SQLSpreadsDemo].[dbo].[PriceList] AS               destination,       -- Destination table where the changes from Excel should finally be updated
        [SQLSpreadsDemo].[dbo].[PriceListMatchedUpdates] AS stage           -- Stage table to temporary store the changes from Excel

WHERE   destination.[ProductCategory] =   stage.[Product Category]   -- Specify the matching keys here
   AND destination.[ProductNumber] =      stage.[Product Number]

-- Delete of all rows in the stage table
DELETE FROM [SQLSpreadsDemo].[dbo].[PriceListMatchedUpdates]
Copy the SQL query above and paste it into the Post-Save SQL query dialog.
Then modify the following part of the query:
- The names of the columns that should be updated (red marked below)
- The names of your stage and destination tables in the format [DatabaseName.[dbo].[TableName] (green marked below).
- The names of the columns that are used to match the rows between the stage and destination tabled (blue marked below)
When finished, you can click the Execute button to test run the query.
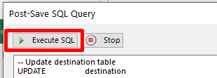
When the result from your test run shows "Query executed successfully" you can click OK twice to go back to the Excel document.
4. Testing the solution
Now you are ready to test the solution.
- Add some rows to the ImportTable sheet and click Save to database.

- When you see the confirmation dialog, click OK and your updates will be saved to the stage table.
- When the changes are saved, the Post-Save SQL query will be executed and will update the destination table with the changes from the stage table.
Optional settings
These are a few optional settings that you can do to further improve the solution.
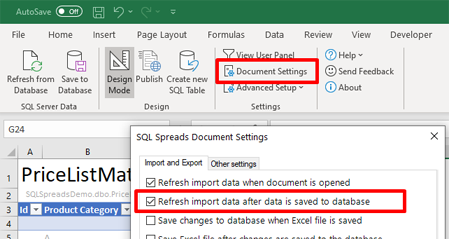
Automatically clear the ImportTable sheet after every import
To automatically clear the import sheet after the changes are saved to SQL Server, go to the Document Settings (open Design mode to enable it) and check the Refresh import data after data is saved to database:
Show any unmatched rows
If you would like to see any unmatched rows after the update is done, you can do a small change to the Post-Save SQL query.
Modify the Delete statement to only delete the matched rows. Then the unmatched rows will be kept in the stage table and you will see them immediately after the update if you also apply the "Automatically clear the ImportTable sheet after every import" option above..
The change you need to do is to replace the Delete statement in the SQL script:

with the Delete statement below:
-- Delete only matched rows - keep unmatched for feedback
DELETE stage

FROM  [SQLSpreadsDemo].[dbo].[PriceListMatchedUpdates] AS  stage,           -- The temporary storage of the updates from Excel
      [SQLSpreadsDemo].[dbo].[PriceList] AS                destination

WHERE destination.[ProductCategory] =                      stage.[Product Category]   -- By specifying the match here, we keep the unmatched rows in the stage table as a feedback to the user
  AND destination.[ProductNumber] =                        stage.[Product Number]
This updated Delete statement will keep any unmatched rows in the stage table.
Insert new rows into the table
If there are rows that do not match, and your users need to insert those rows into the destination table, you can create a separate import sheet where new rows can be inserted into the destination table:
-
Create a new sheet in your Excel document.
-
Go to the SQL Spreads Designer and select your destination table.
-
Go to the columns tab and select the columns that the user must fill out to insert new rows.
-
Go to the Settings tab in the Designer and check the Only allow inserting new rows. This setting will prevent users from modifying any existing rows in the table.

You will now have a separate Import sheet in the document where the users can insert new rows into the table.
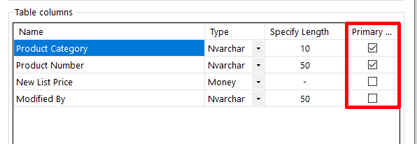
Show warning for duplicate rows
If you would like to give users a warning when they enter duplicate rows into the ImportTable sheet, make sure that you check the Primary Key checkboxes for your key/match columns when you create the stage table:
Hide the Id column
To hide the Id column from the ImportTable sheet follow these steps:
-
Open the SQL Spreads Designer
-
Go to the Columns tab
-
Make sure your key/match columns are set as Key columns
-
Uncheck the Is key checkbox for the Id column
-
Uncheck the Show checkbox for the Id column

If you need any help to get the solution up and running, please send an email to support@sqlspreads.com