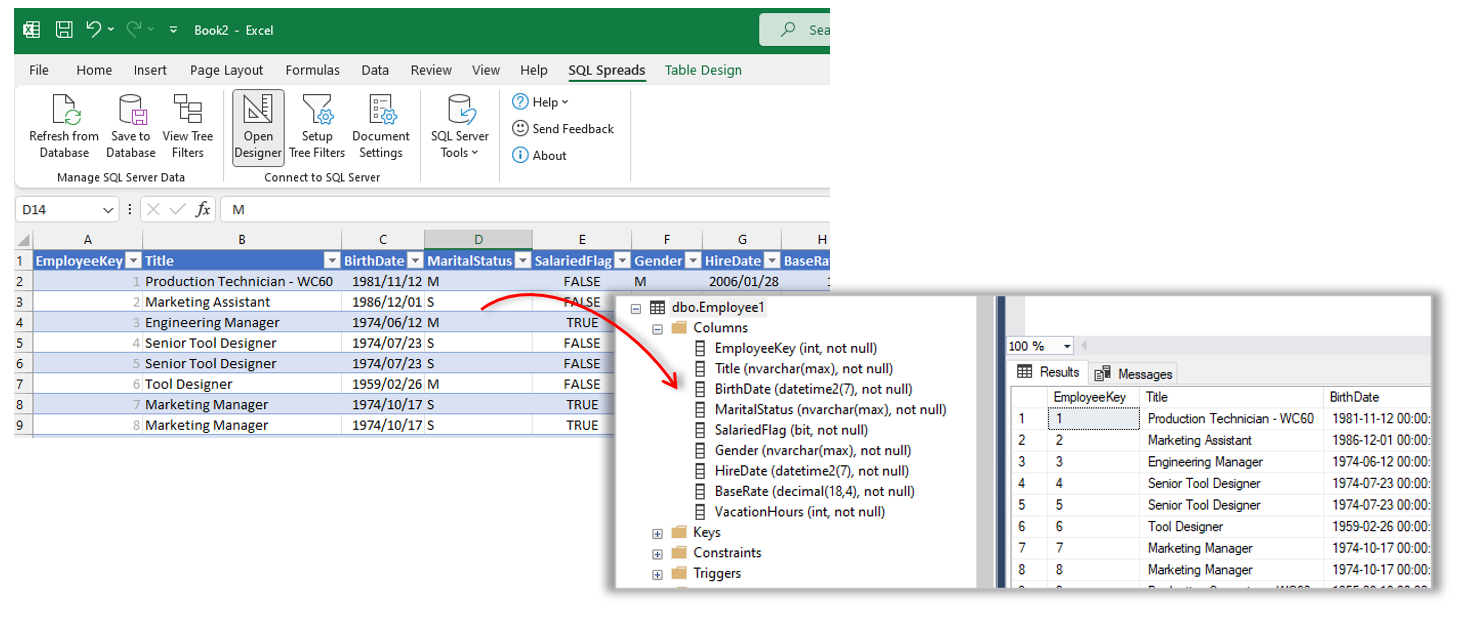
The SQL Spreads Table Creator is a new feature in SQL Spreads 5.0 to create SQL Server tables directly from within Excel and pre-load them with the existing data in your Excel spreadsheet.
The Table Creator makes it possible to create SQL Server tables in just a few clicks. For those of you who are more advanced users, it is possible to fine tune the creation of the table like setting the exact data types on each column.
Prepare your data in an Excel
The SQL Spreads Table Creator uses the Excel table format to fetch extra information about the data formats, so you will need to have your data in an Excel table like this:

If you don’t have an Excel Table it is super easy to create one:
-
Click a cell within your data range
-
Press CTRL + T (hold down the CTRL-key and press T)
-
The Create Table dialog will be shown:
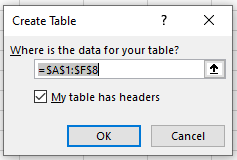
- Click OK and your data will now be in an Excel table.
Create the table in SQL Server
- Download and install the SQL Spreads Excel Add-In (if you do not have it setup already).
- Click the SQL Server Tools button in the SQL Spreads tab in Excel and then click on the New SQL Server table from Excel option :

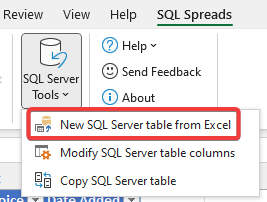
- If this is the first time you are using SQL Spreads or the Table Creator, you will see the dialog to connect to your SQL Server.
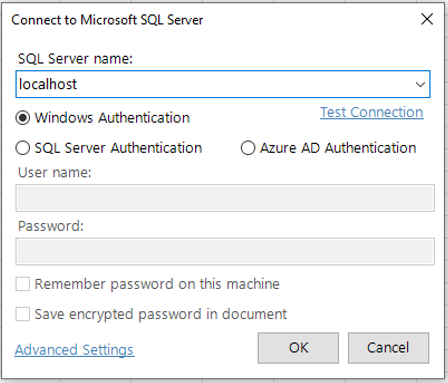
Fill out your server details and click OK
If you need help with connecting to your SQL Server, please see this article about how to connect to SQL Server.
If you have used the Table Creator before, the last used SQL Server connection will be used by default.
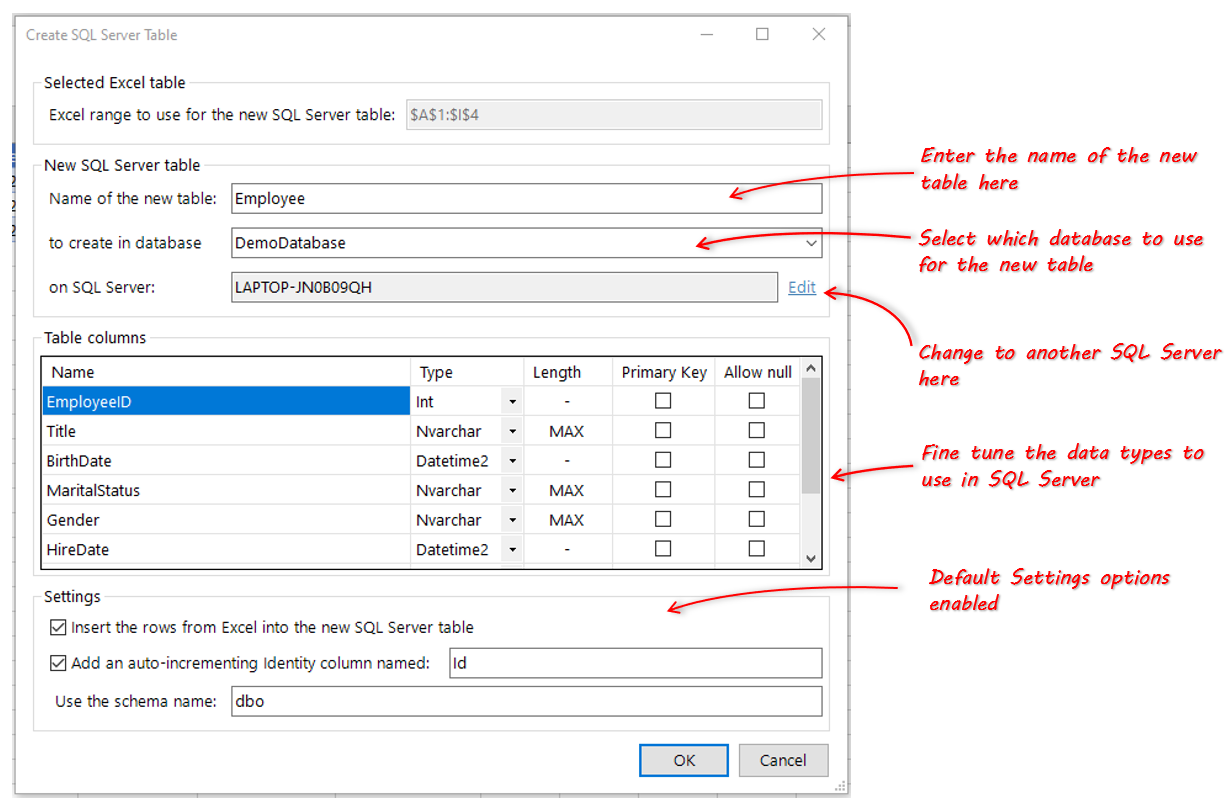
- Once you are connected to SQL Server, you will see the Create SQL Server Table dialog:
Specify the table name and which SQL Server database to create the table in. SQL Spreads will always remember the last used table. If you need to change to another SQL Server click the Edit button next to the server name.
Fine tuning the data types to use in SQL Server
You will see all the table columns in Excel and be able to specify the exact data types to use. To use another data type, click the Type drop down list and select another data type for each required column:
For the following data types you can also specify the exact size of the column in the database:
- Varchar and NVarchar: Can be set to the max number of characters or MAX to auto-adjust the size based on the content in the column.
- Decimal and Numeric: The length must be entered as '(7,3)' where the first number is the total number of figures and the last number is the number of figures after the decimal separator.
You can set a specific column to be the Primary Key by checking the Primary Key box.
If your columns should allow nulls, then check the Allow null box for each required column.
Default settings
The option Insert the rows from Excel into the new SQL Server table is enabled by default. If the setting is disabled, none of the rows from your raw data, that you used to create the table initially, will be inserted into the newly created table in the database.
The option Add an auto-incrementing Identify column is enabled by default. This will automatically add an auto-incrementing Identity column into your table that you can name according to your requirements.
By default, the schema name dbo will be used for your newly created table. You can re-name the schema to align to your SQL Server table naming convention in your database by using the Use the schema name field.
-
Click OK to create the table.
-
A confirmation dialog will be show that the table was created and how many rows of data was inserted into the table:
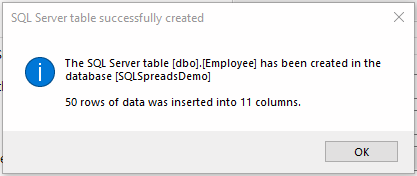
Updating your new table using SQL Spreads
If you would like to update your newly created table from Excel, follow the steps below:
-
Click the Open Designer button twice to close and reopen the SQL Spreads Designer:
-
You should now see your new table in the Database tab in the SQL Spreads designer:
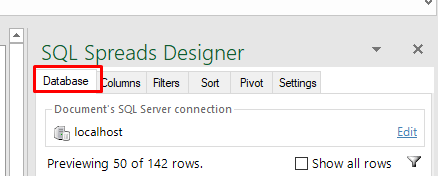
-
Select your table in the list to load it into Excel. You will now be able to update and manage the data in the table from within Excel.
