SQL Spreads is designed to be able to do large scale deployments of the application in a corporate environment. You can do a packaged distribution of the installation and also use our licensing tools to simplify large scale deployments.
MSI Installer
The SQL Spreads MSI-installer can be used to do a packaged installation of the SQL Spreads Excel Add-In.
To obtain the MSI installer for creating a deployment package, please send an email to support@sqlspreads.com
Including a common license key in the installation
If you have the License Manager Add-On you will get one common license key for all users.
You can include the common license key in the installation by setting the MSI property LICENSEKEY_PROPERTY to your license key.
msiexec /i "SQLSpreadsSetup.msi" LICENSEKEY_PROPERTY=E07Q1-11E0D-EA001-91301-02014-03040-05060E
If you are updating SQL Spreads, you can force an update of the license key by setting the MSI property FORCE_LICENSEKEY_UPDATE to 1:
msiexec /i "SQLSpreadsSetup.msi" LICENSEKEY_PROPERTY=E07Q1-11E0D-EA001-91301-02014-03040-05060E FORCE_LICENSEKEY_UPDATE=1
Silent installation
To install SQL Spreads silently, download the MSI installer and run it from the command line using msiexec with the /quiet option:
msiexec /i SQLSpreadsSetup.msi /quiet
Per-machine installer
The default SQL Spreads installer will install SQL Spreads Per-user. There is also a per-machine installer available. To get the per-machine installer, please contact support@sqlspreads.com.
Using the per-machine installer for 64-bit Excel
When using the Per-Machine installer, SQL Spreads cannot detect if Excel is installed in 32 or 64-bit, so this needs to be speicifed during installation.
If you are doing a silent MSI per-machine installation, you will have to specify if Excel is installed in 32 or 64-bit . You do that by adding the property IS64BITEXCEL and set to either 0 or 1.
The MSI command for installing with the per-machine installer on a system having 32-bit version of Excel:
msiexec /i SQLSpreadsSetup_PerMachine.msi IS64BITEXCEL=0 /quiet
The MSI command for installing with the per-machine installer on a system having 64-bit version of Excel:
msiexec /i SQLSpreadsSetup_PerMachine.msi IS64BITEXCEL=1 /quiet
Default settings for the per-machine installer
When you use the per-machine installer, you can add a settings file that will be used as the default settings for SQL Spreads the first time a user starts Excel after the SQL Spreads Excel Add-In has been installed.
To add the default settings file, download this settings file, configure your default settings and save the file into the folder:
C:\Program Files (x86)\Obnex Technologies\SQL Spreads Desktop
To revert a user to the default settings, you can delete the settings file below. Before you delete the file, the user will need to close all SQL Spreads documents.
C:\Users\[USER NAME]\AppData\Roaming\Obnex Technologies AB\SQL Spreads Desktop\Settings.xml
These are a few examples of default settings:
Add a common license key to be used by all users
Replace the xxxxx-xxxxx-xxxxx below with your common license key:
<LicenseKey>xxxxx-xxxxx-xxxxx</LicenseKey>
Add a default database connection for Design mode
<DefaultDBConnection> <AuthenticationType>WindowsAuthentication</AuthenticationType>
    <SQLServerName>localhost</SQLServerName>
    <SQLUserName />
    <SQLPassword />
    <SQLSavePassword>false</SQLSavePassword>
    <DefaultDatabase />
    <EncryptConnection>false</EncryptConnection>
    <TrustServerCertificate>false</TrustServerCertificate>
    <iConnectionTimeout>15</iConnectionTimeout>
    <iExecutionTimeout>30</iExecutionTimeout>
  </DefaultDBConnection>
Add a list with SQL Server names to the last used servers list in Design mode
<LastUsedSQLServerInstances>
    <SSUsedServers>
      <AuthenticationType>WindowsAuthentication</AuthenticationType>
      <SQLServerName>dw-server1</SQLServerName>
      <SQLUserName />
      <DefaultDatabaseForAzure />
    </SSUsedServers>
    <SSUsedServers>
      <AuthenticationType>WindowsAuthentication</AuthenticationType>
      <SQLServerName>dw-server-test</SQLServerName>
      <SQLUserName />
      <DefaultDatabaseForAzure />
    </SSUsedServers>
  </LastUsedSQLServerInstances>
To get the exact format of a configuration, you can always do the change in SQL Spreads and then copy the setting from this file:
C:\Users\[USER NAME]\AppData\Roaming\Obnex Technologies AB\SQL Spreads Desktop\Settings.xml
Registry keys
There are several registry keys you can use to control how SQL Spreads behaves.
The registry path depends on how SQL Spreads was installed:
| Installation | Registry key path |
|---|---|
| Per-user installer | HKEY_CURRENT_USER\Software\Obnex Technologies AB\Obnex SQL Spreads |
| Per-machine installer | HKEY_LOCAL_MACHINE\SOFTWARE\WOW6432Node\Obnex Technologies AB\Obnex SQL Spreads |
Supplying the common license key using the registry
You can provide a common license key either via the MSI command line or by setting a registry value.

| Value name | Value |
|---|---|
| InstalledLicenseKey | eg E07Q1-11E0D-EA001-91301-02014-03040-05060E |
If you would like to change the license key for an existing installation, you can set the following registry key to 1 to force an update of the license key to the license key supplied in the registry key InstalledLicenseKey:
| Value name | Value |
|---|---|
| ForceLicenseKeyUpdate | Set to 1 to force a license update |

Disable Check for updates
By default, SQL Spreads automatically checks for new versions and notifies the user when an update is available.
You can disable this behaviour by adding the following registry value:
| Value name | Value |
|---|---|
| Disable_CheckForUpdate | Set to 1 to disable update checks |
When Disable_CheckForUpdate is set to 0 or not present, SQL Spreads will check for updates.
Disable SQL Server tools
The SQL Server tools in SQL Spreads are only available with a Designer License.
If needed, you can disable individual tools by setting the following registry values:
| Tool | Registry value |
|---|---|
| Disable the Table Modifier | Set the string value Disable_TableCreator to 1 |
| Disable the Table Copier | Set the string value Disable_TableModifier to 1 |
| Disable the Table Creator | Set the string value Disable_TableCopier to 1 |
Installing on Remote Desktop Services or Citrix
To install SQL Spreads on Remote Desktop Services or Citrix, you will need to use the per-machine installer. Please contact support@sqlspreads.com to get the per-machine installer.
- On Remote Desktop Services, open the control panel and start the “Install Applications on Remote Desktop Server”.
- Select the SQL Spreads per-machine installer and follow the steps.
- If you are using several servers, please install the SQL Spreads Excel Add-In on each server.
This will install the SQL Spreads Excel Add-In for all users. To specify a selection of users who should see the SQL Spreads Excel Add-In in Excel, please see the section below for how to load the Add-In only for specific users.
Loading the SQL Spreads Excel Add-In only for specific Remote Desktop Services users
To prevent the SQL Spreads Excel Add-In to load for every Excel user on a Remote Desktop Services or Citrix installation, please follow the steps below:
-
Install the SQL Spreads per-machine installation as above.
-
To prevent the AddIn to load for all users, remove the keys in the following registry paths:
For 32-bit Excel: HKEYLOCALMACHINE\SOFTWARE\Wow6432Node\Microsoft\Office\Excel\Addins\SQL Spreads
For 64-bit Excel: HKEYLOCALMACHINE\SOFTWARE\Microsoft\Office\Excel\Addins\SQL Spreads -
Open Excel from a user and verify that the SQL Spreads Add-In is not loading.
-
For every user that should have the SQL Spreads Excel Add-In loaded, add the following keys node
HKEY_USERS\[THE USER'S SID]\Software\Microsoft\Office\Excel\Addins\SQL Spreads:
"Description"="SQL Spreads"
"FriendlyName"="SQL Spreads Add-In"
"LoadBehavior"=dword:00000003
"Manifest"="file:///C:\Program Files (x86)\Obnex Technologies\SQL Spreads Desktop\SQL Spreads.vsto|vstolocal"
You can automate this process either by using a group policy registry preference or a logon script.
Registry settings to load the SQL Spreads Excel Add-In in Office
Microsoft Office uses a few registry keys to detect if an Excel Add-In is installed. These registry keys are automatically configured by the SQL Spreads installer.
If you have created a packaged installation, and the Excel Add-In does not load, please ensure that these registry keys are set during an installation.
Per-User installer registry settings
The keys should be set under:
HKEY_CURRENT_USER\Software\Microsoft\Office\Excel\Addins\SQL Spreads

There are four keys that should be in the registry:
Key 1:
Name: Description
Type: REG_SZ
Data: SQL Spreads

Key 2:
Name: FriendlyName
Type: REG_SZ
Data: SQL Spreads Add-In

Key 3:
Name: LoadBehavior
Type: REG_DWORD
Data: 0x3

Key 4:
Name: Manifest
Type: REG_SZ
Data: file:///C:\Users\[USER NAME]\AppData\Local\Obnex Technologies AB\SQL Spreads Desktop\SQL Spreads.vsto|vstolocal
Per-Machine installer registry settings
The keys should be set under:
HKEY_LOCAL_MACHINE\SOFTWARE\Microsoft\Office\Excel\Addins\SQL Spreads

There are four keys that should be in the registry:
Key 1:
Name: Description
Type: REG_SZ
Data: SQL Spreads

Key 2:
Name: FriendlyName
Type: REG_SZ
Data: SQL Spreads Add-In

Key 3:
Name: LoadBehavior
Type: REG_DWORD
Data: 0x3

Key 4:
Name: Manifest
Type: REG_SZ
Data: file:///C:\Program Files (x86)\Obnex Technologies\SQL Spreads Desktop\SQL Spreads.vsto|vstolocal
Prerequisites
The default SQL Spreads Excel Add-In is installed per-user and can be installed without Administrative rights.
The installer will check for missing prerequisites and install them if necessary. The prerequisites will require Administrative rights to be installed.
The following are the prerequisites that need to be installed:
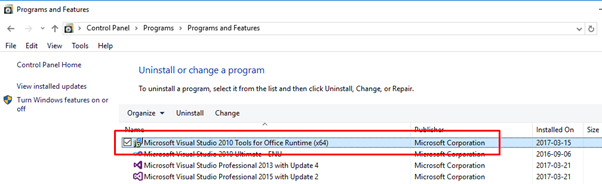
VSTO 2010 Runtime - this should be included in the Office installation for Office 2013 and later. In some cases, a custom Office installation may not include the VSTO Runtime, so check that your clients have it installed. In Control Panel > Program and features it is installed as “Microsoft Visual Studio 2010 Tools for Office Runtime”
The Visual Studio 2010 Tools for Office Runtime installer can be downloaded from here.